Recording Vocals For Beginners: Achieve The Best Quality Sound
If you’re new to recording vocals and need a beginners guide to get things rolling then you’ve come to the right place. This blog will teach you how to achieve the best quality vocal using basic techniques and equipment.
A good rapper buddy of mine recently wanted to record vocals to some beats I produced. With COVID-19 restrictions he couldn’t just drop by and record with me. Instead he had to record for himself (first time). He was lost at where to begin or how to even do it, this might be a similar position to where you are now or someone you know. In this blog we will provide you with an understanding of the fundamental way to get a great recording . Once you get these downpat you can continue to build up your skills.
Lets get into it.
What Equipment will you need for Recording Vocals?
Audio Interface
Your Audio Interface will convert the analog signal of your input (in this case the microphone) into a digital format that you DAW can interpret.
-
 Free ShippingOriginal price was: $85.$78Current price is: $78.
Behringer UM2 U-Phoria 2×2 Audio Interface
-
 Free Shipping$199
Focusrite Scarlett Solo 3rd Gen USB Audio Interface (Cubase LE included)
-
 Free Shipping$269
Focusrite Scarlett 2i2 3rd Gen USB Audio Interface (Cubase LE included)
-
 Free Shipping$89
Behringer U-Phoria UMC22 – USB Audio Interface
DAW (Ableton, Fl Studio, etc)
Your DAW is the recording software that will withhold the music of your project and capture the recording of your singers voice.

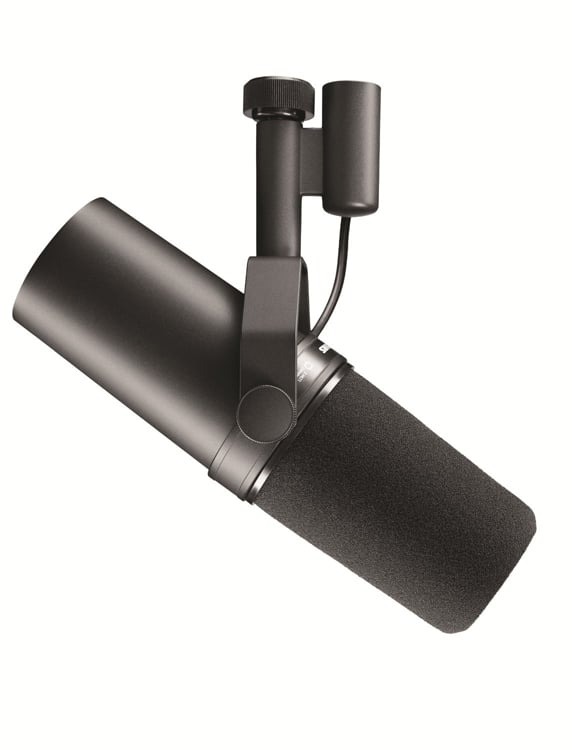
Microphone
You will need a recording microphone in order to pick up and record your singers voice.
-
 Free ShippingOriginal price was: $378.$297Current price is: $297.
Shure MV7X Podcast Microphone with XLR Black
-
 Free Shipping$460
sE Electronics sE 2200 Condenser Microphone
XLR Cable
Your XLR cable will be the connecting link between your microphone and your audio interface.

Mic Stand
Your Mic Stand will hold your microphone in a steady position ready to record.


Closed Back Headphones
Closed Back Studio Headphones will enable your vocalist to listen to the music while they sing without your speakers or external sound source blasting into the microphone at the same time.
-
 Free Shipping$129
Sennheiser HD280 PRO Professional Studio Headphones
-
 Free ShippingOriginal price was: $112.$75Current price is: $75.
AKG K52 Closed-Back Headphones for Live Sound Monitoring & Recording Studios
-
 Free ShippingOriginal price was: $122.$105Current price is: $105.
AKG K72 Closed Back Studio Headphones
-
 $45
$45Behringer HPX4000 Studio DJ Headphones
Pop Filter
Pop Filters stop puffs of air hitting the microphone from your singer. They are known as “pops” (mini explosions)
Studio monitors
Studio Monitors help to give you a clear image of the sound recording and vocals.
-
 Original price was: $759.$358Current price is: $358.
JBL LSR305P MKII Pair Studio Monitors 5 Inch
-
 $439
$439AVE PK-Fusion5 Studio Monitor Pair 5 Inch
-
 $609
$609Yamaha HS5 Pair 5 Inch Studio Monitor
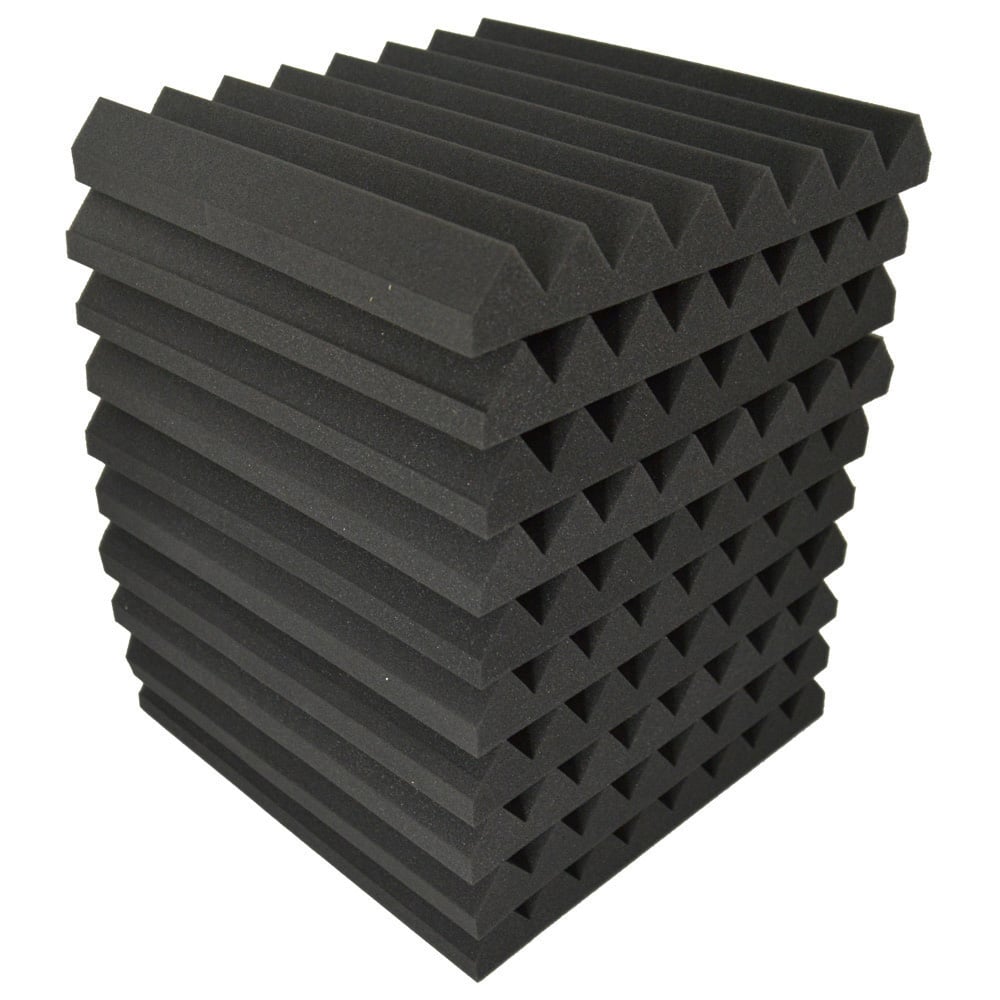
Acoustic Foam
Not essential, but recommended. Acoustic Foam will give your vocals a better image and lessen the image represented by your room.


How To Record Your Vocals
First things first: Open your DAW
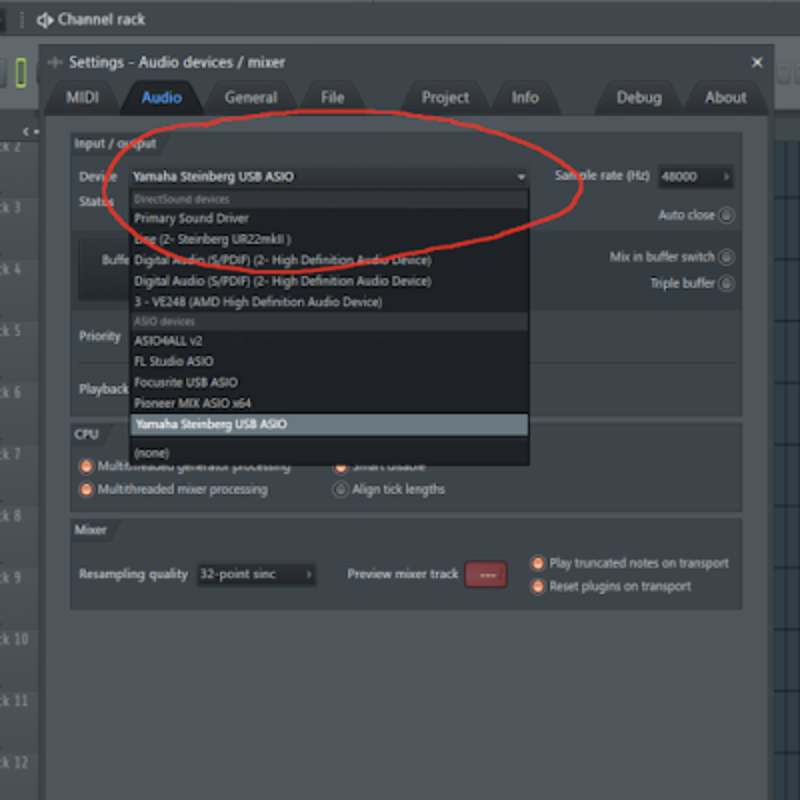
Make Sure Your Audio Interface Is Set Up
Go into your settings/preferences. Select your audio interface instead of using your computer’s in-built audio card (Mine is a Steinberg) (The reason being is that your computer’s audio card has no way of capturing the input from your microphones analog output). This will feed the audio from your microphone into your interface and into your DAW.

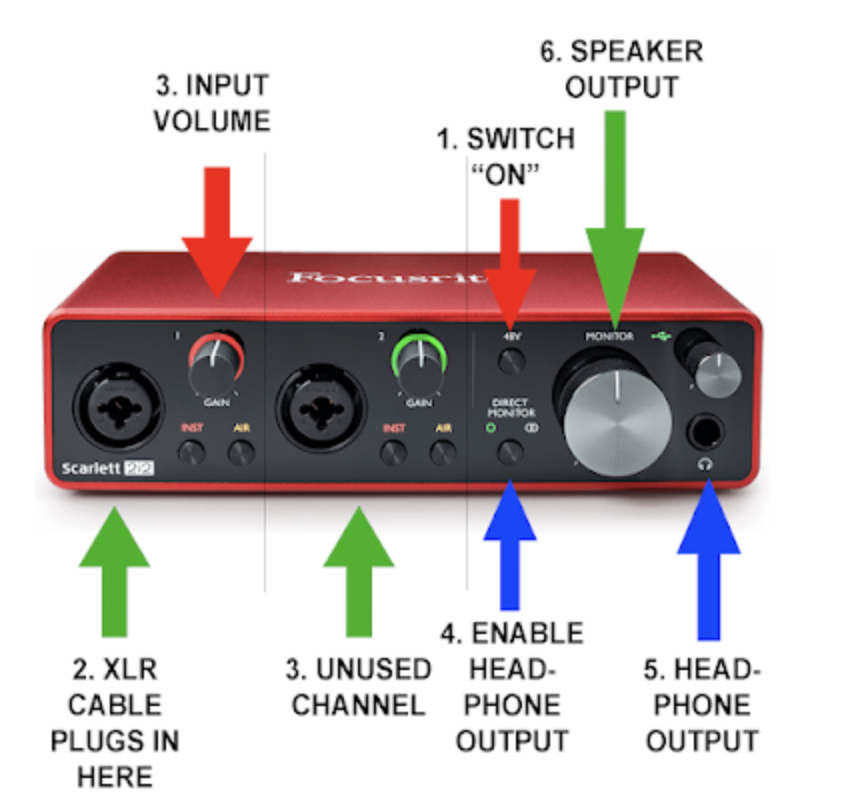
Setup Your Microphone
Okay, now there are a few types of microphones you will most likely see. What’s more important right now is that you have the appropriate stand and/or attachment for your microphone. This was a problem for me once. I was given a nice mic to use but i didn’t have the correct attachment for my basic stand. Some condenser microphones sit in a shock mount and others clip on or clip into the stand. Make sure you have the correct one.
Once your microphone is set on its stand, you’ll then want to plug your microphone input (cable) directly into the audio interface. The cable should plug in naturally.
Open the line-in within your DAW so audio is available to be captured
This is how we tell your DAW to listen to the audio from your INPUT (in this case the microphone) so you can hear it and record it.
Select whichever input that your microphone is plugged into (example. INPUT 1).

You will know you are receiving a proper signal when you speak into the microphone and the gain level rises on the meter.

Alter input gain to a steady level. (Nowhere near clipping (Distortion)
So now you are ready to record. Everything is in place. HIT RECORD. You will notice the input of your singers voice.
But wait!
It could be too quiet and you need to turn the input up or they may be singing loudly and you need turn the input down (or have them sing quieter).

Do whatever you need to do to make sure the levels are good by turning the input volume up or down on the microphone. Be certain they are not clipping otherwise you will damage the recording (this is a common point where vocal recording mistakes happen).
You will need to balance the volume going into the DAW (input) alongside the volume going into your singers ears (headphones). Don’t make the mistake of having the headphones volume too loud. This will encourage you vocalist to sing loud and most likely clip in the input. If you properly manage it however you can always achieve a good volume recording
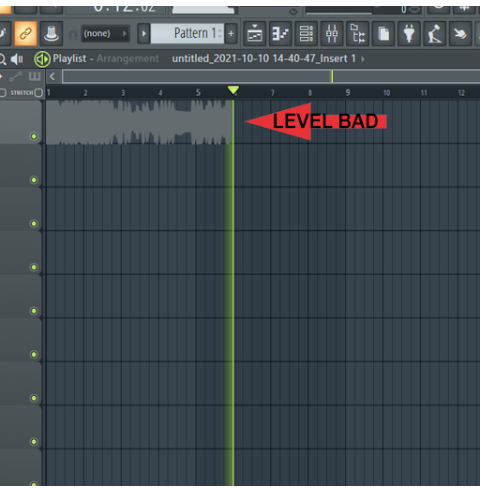
If you don’t pay attention to gain levels you can potentially find that the entire project could be distorting creating bad quality recordings.

Singer Placement for Recording Vocals
For closeness (x):
Place the singer 15cm away from the mic. Have them spread their fingers, touch their lips with their thumb and then touch the mic with their pinky. This is perfect for getting the right distance from the microphone while recording vocals (x). Too close means a muffled bassy response. Too far will mean not enough warmth or bass response creating a thin sound.
For height (y):
Position the microphone so it is line with the singers mouth. If the mic is too high you will catch more treble in the voice and less bass. If you leave the mic too low you will capture more bass and not enough treble.
Experiment. Start with position above and listen and then judge for you singer whether to bring it higher or lower and closer or further. It may be dependant on the type of track you are creating.
(E.g) We were producing a track recently where the vocal style was to sound seductive and personal, almost as if the singer was talking into your ear. We decided to bring the singer closer to the mic than we usually would and position the might slightly higher for more bass to achieve the tone and feeling we desired.
Keep it consistent so that each of your recordings produce a similar sound. Don’t have your singer moving all over the place. Keep a refined position.
Bonus Tips for Recording Vocals
Create the mood
Get some nice lighting, put down a nice rug and keep the vibe encouraging. The mic will pick up all the energy in the room and it never lies. So keep it fun, exciting and know the vibe you’re going for. Remember! treat the singer or yourself like a superstar.
Acoustic treatment
You may want to improve your recording and invest in a vocal booth or acoustic solutions. One is good, together they are great. It helps knock out the sound of echoes/reflections in the room you’re recording in. This allows the direct sound of your singer’s voice to be picked up cleaner and clearer by the microphone.
The Final Say
If you follow these steps here you will have a really satisfying vocal recording in no time and have the skills to keep reproducing great vocal results.
Get the gear you need, get the correct signal flow in order and monitor the levels as you go, anyone can do it, all it takes is a little practice!
We at DJ CITY are ready to support you recording the vocals of your dreams and we know it can be hard to get going. So we have bundled all the fundamental pieces of equipment you will need in a pack. If you have come this far in this blog we have a special offer for you.
If this helped please share with your friends and let us know if you are interested in hearing more advanced techniques in the future.
Alex.