How To Make Music – 2021 Beginners Guide to Music Production
How do you make music? If you’ve been thinking about getting into music production, you’ve probably got no idea where to start. Maybe you’ve heard the term DAW being thrown around, or maybe you’ve just seen your friend jam out on their equipment. You’re excited about producing music, but feel overwhelmed by the steep learning curve ahead of you.
It’s important to note, that every successful music producer once felt exactly the same way. Not knowing what to do first, or where to focus their time learning. That’s why we’re writing this article on how to make music! Giving you a basic blueprint to music production, so you can be on your way to creating songs you can be proud of over the course of 2021!

What You’ll Need
It’s 2021, and by now, you’ve probably worked out that you don’t need access to a professional recording studio. Nor do you need thousands of dollars worth of equipment in order to produce professional and high-quality tracks. But what equipment do you need to buy so you can get started? Long answer short, the only necessity in terms of gear and equipment is a Digital Audio Workstation, or DAW as it’s often abbreviated to (assuming you already have a computer). However, there are a few nice to have’s that will definitely help getting started with your production. These will also depend on the style of music you’ll be making, and whether you intend to record vocals, instruments, etc.
Music Production Software/Digital Audio Workstation
First things first, the one thing that every music producer needs to make music is a Digital Audio Workstation (DAW). But what exactly is a DAW? To put it simply, it’s a piece of music production software that allows you to edit, record, and produce audio. In order to start making tracks, you’ll need to have access to a DAW, or alternatively, own a standalone music production controller such as the MPC X or Maschine that gives you everything you need in one piece of hardware.
You can also find capable software for your iPhone or iPad to help you produce music. However assuming you’re just getting started, we’ll be focusing on a computer-software setup for now.

Which DAW is the best?
If you hang around musos and producers, you’ve probably heard names such as Ableton, FL Studio, or Pro Tools being thrown around. As each workstation offers a unique set of tools for producing, it’s hard to pinpoint one as the best DAW for beginners. So we’ll list just a few of the most popular ones below for you to take a look at. Buying your first piece of music production software can be a costly investment. So we recommend you download a few that you like the look of, and play around with the free trial version before you decide where to throw your money. Or, if you already have friends who produce music, it might be a wise decision to follow their chosen DAW path. Then, you’ll be able to bounce new learnings off each other and wrap your head around your DAW even faster!
You’ll likely find that one or more DAW’s will just click well with you. While others might make you feel even more overwhelmed than when you first clicked on this article. So choose the one that resonates best with you, before going out and spending the money on a DAW that could put you off music-making all together!
Ableton
What makes Ableton Live unique, is the fact it was originally designed as an instrument for live performances. Now, it’s grown into a complete audio recording package. Sporting an intuitive user-interface, and the renown Session and Arrangement views; Ableton makes it easy to get started whether you’re producing music or performing live.
FL Studio
Formerly Fruity Loops, FL Studio is perhaps the most popular Digital Audio Workstation on the market. Offering an easy to use interface that is used by both bedroom producers and music professionals. It’s also one of the most cost-effective pieces of software and can be easily bolstered by the use of third-party plugins. Furthermore, the latest flagship update to FL Studio 20 has seen the software now compatible for MAC users.
Pro Tools
Avid’s Pro Tools software is the go-to, industry-standard DAW for countless recording studios. So it’s no surprise that most major production houses are built around it. Packed with innovative recording tools, there’s not much you can’t do with Pro Tools.
Reason
Reason gives you a DAW that’s completely unique due to the innovative “Reason Rack”. Emulating a real-life recording studio, Reason allows you to plug-in and connect hardware emulations just as you would a real piece of gear. An intuitive interface that’s easy to pick up, the latest version of Reason also has support for third-party plugins, so you can take the already powerful rack to the next level!
Cubase
Steinberg’s Cubase delivers an easy, intuitive workflow with a powerful engine that’s packed with processing power; Cubase is another DAW that’s perfect for both beginners and professionals.
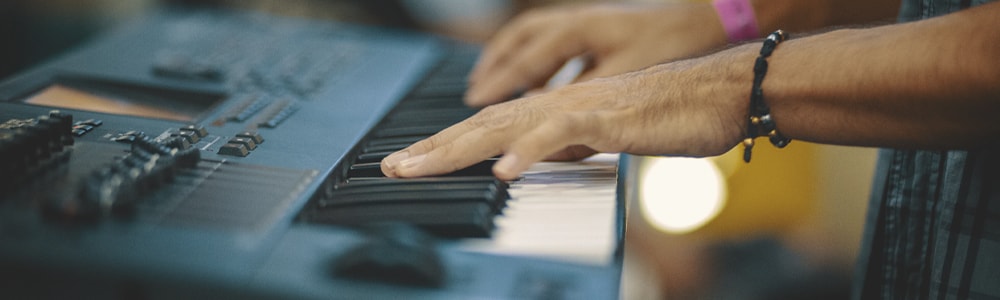
Keyboard / Controller
Assuming you’ve got yourself a copy of your desired DAW. It’s possible to do everything from here using only your computer peripherals such as your mouse and keyboard. However, you’re going to be restricted with what you can do, and your workflow might be a little bit all over the place. Adding a MIDI Keyboard or a pad controller to your setup will allow you to create freely. Not only giving you a more rewarding feeling while you’re making music but giving you a whole lot more control right at your fingertips. As a result, a MIDI Keyboard or pad controller will push your creative boundaries and have you delving deeper into the world of music production.
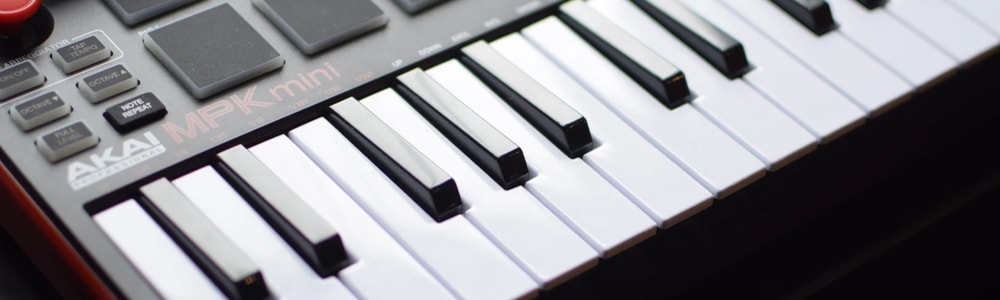
The genre of music you’re going to be creating will determine the best MIDI keyboard or controller for your needs. If you’re not yet sure what you’ll be producing, a good starting point is to get yourself a MIDI controller that does both, such as the Akai MPK MINI.
A renowned and popular controller, the MPK MINI gives you a 25-key portable MIDI keyboard that also features 8 of the revolutionary MPC-style pads. Not to mention a number of assignable knobs to further tweak your productions. Above all, the MPK Mini is a portable controller that gives you just enough room to whip up catchy melodies. While the MPC pads ensure you’ll have fun banging out groovy drum breaks to match.

Headphones and/or Studio Monitors
Aside from your music production software, the next most thing of importance is a set of studio headphones, or monitors.
What separates a set of studio monitors or headphones from your average pair is the frequency response. Traditionally, your pair of home hi-fi speakers or headphones are designed to make your music sound as pleasing to the ear as possible. Boosting certain frequencies to accentuate the bass and deliver a loud, punchy sound. Given that most of these speakers will be tweaked slightly differently; you’ll often run into issues when playing your songs on other speakers.
On the other hand, studio monitors and studio headphones are designed to deliver a true sound and accurate response. Highlighting every frequency and sonic aspect of what you’re working on without emphasizing particular frequencies over others. Therefore, delivering an accurate audio picture of your productions and allowing you to make critical choices. Above all, investing in a set of studio headphones or monitors is going to help you produce better music! For a more in-depth look at studio monitors, check out our article here or have a look at the most popular brands of studio monitors including KRK, JBL, Yamaha, and more
Audio Interface
An audio interface is regarded as the brain of your home studio and is responsible for providing high-quality sound recordings and playback. To put it simply, an audio interface gets audio into and out of your PC or MAC. Turning your analog audio signals into digital information and vice versa using AD/DA converters. With higher quality converters, you’ll get a better performing interface.
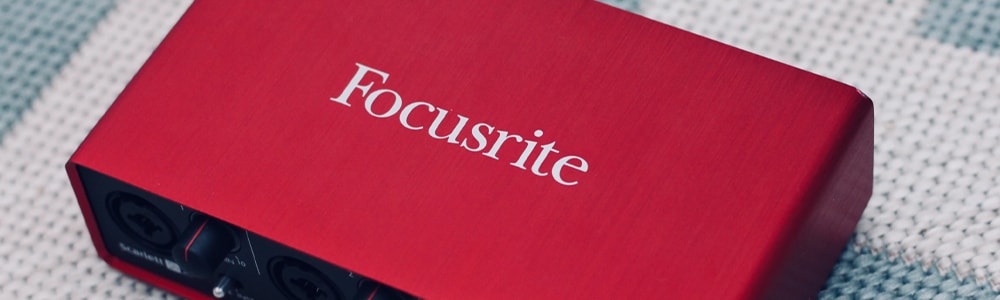
Although not required in order to start making music; an audio interface becomes a necessity when you need to connect Studio Monitors, Instruments, or Professional Microphones to your DAW. If you’re looking to buy an audio interface, the price is going to vary largely depending on the quality of the converters, and the number of inputs and outputs. Assuming you’re running a small home studio, you’re likely not going to need large amounts of inputs or outputs as you’re likely going to be only connecting your speakers, headphones, and possibly a microphone and instrument. So you’re going to be well and truly covered with a 2-in, 2-out audio interface such as the Behringer UM2, or Focusrite Scarlett 2i.

Microphone
Finally, the last piece of studio recording equipment you might need for making music is a professional studio microphone. Again, not a necessity, but if you plan on recording vocals to layer over the top of your productions then it’s something you might need to invest in. When it comes to studio microphones, you’ve got a couple of options to consider. Firstly, a studio condenser microphone offers highly sensitive recordings, giving you a cleaner and more accurate sound. However, unlike dynamic microphones, condenser microphones often require phantom power to power the mic, as well as an XLR input. So you’ll need to combine it with an audio interface to send power to your mic. The RODE NT-1 Kit is a great microphone kit to get you started, while the Behringer C-1 and AVE VoxCon-XLR round off some more affordable options.
Alternatively, if you need a microphone but want to avoid having to buy yet another piece of equipment like an audio interface; you can always opt for a USB Condenser microphone. Still offering pristine quality audio, USB microphones are a great option if you’re looking to save a little extra cash. A fantastic and affordable option would be the AVE VoxCon USB or the RODE NT-USB if you’re happy to spend a little more.
VST Plug-Ins
Whichever digital audio workstation you choose, you’re sure to have more than enough tools at your disposal to create some amazing music. However, once you get a little more acquainted with your music software, you might eventually want to branch out into some third-party VST plugins to bolster the capabilities of your software. Whether its emulations of classic synthesizers, effects such as EQ, Compression or Reverb, or more advanced plug-ins for the final stages of mastering. There’s no denying that third-party plug-ins can definitely give you an extra bit of edge to use with your music.
Learning the basics
By now you’ll have got yourself a Digital Audio Workstation and be ready to start making some music. But before you get into making your first song, the following tips are sure to set you up for success.
Listen to more music
Firstly, before you’ve even opened up your DAW, one of the most valuable tips for making a hit song is to simply listen to more music! At this stage, you’ve probably worked out the kind of music you plan on creating. Whether it be boom bap hip hop beats reminiscent of the golden-era, smooth lo-fi beats, bass pumping EDM, or jazz. Your options are endless when it comes to digital music production. So it’s important to have an end-goal in mind when it comes to the sound you’re looking for.
So sit down, throw your headphones on, and spend some quality time just listening to tracks that inspire you. It’s a crucial aspect of making music and is a sure way to give you a good start for churning out professional-quality sounds.
For example, if you’re looking to make hip-hop beats. It’s important to listen carefully to what goes into a variety of hip-hop beats. You’ll notice hard-hitting kick drums, punchy snares, and thin hi-hats, then take notes on the structure and placement of each sound within the drum pattern. This is going to give you a great headstart rather than aimlessly adding in sounds that sound helplessly out of time.
Learn your DAW
So by now, you’ll have chosen and downloaded a copy of a DAW, or at least a trial version. You’re probably tempted to get stuck in straight away and start making music, however, this will likely result in confusion and frustration. We recommend either getting stuck into the manual or if you’re not a reader, head over to Youtube. No matter which DAW you end up on, YouTube is packed full of videos and tutorials that are sure to get you acquainted with the basic functions of your DAW. We’ll share a few great beginner tutorials for some of the most popular workstations below.
Music Theory
You’d be forgiven if you think you can build a successful music production career without knowing a single piece of music theory. Because that very well may be the case. However, it’s going to make your life a hell of a lot easier if you take the time to learn the fundamentals. Then, continue to learn more as you need over the course of your music career. Because even though electronic music production differs from traditional music composition and production. It still has chords and melodies at the core, therefore, relying on the same fundamentals of music theory! Here’s a great video to get you started!
Practice & Experiment
By now, you should be fairly acquainted with your DAW, and have a basic knowledge of music theory. This is where the fun begins! So open up your DAW, and without having an end song goal in mind, just have fun and experiment. A good idea would be to try and recreate a few different songs that you like the sound of. This will give you an even better understanding of what exactly goes into the songs you’re trying to make. So you can then transfer this knowledge into your own creations!
Another tip is to avoid pidgeon-holing yourself into one genre of music. Although not always a bad thing, diversifying your style is a sure way to help you learn quicker.
Make Some Music!
It’s time to get cracking and create your first song, from start to finish! More importantly, don’t worry if it doesn’t turn out exactly how you wanted it to sound, or isn’t perfect. The chase for perfection will get you caught in a loop that’s impossible to get out of! So it’s important to not only get started on your first song but finish it too!
Start with the melody
Every producer has their own method for starting a new song. We recommend first starting with an instrument, whether it be a classic piano or a punchy synth. Creating a melody (no matter how simple it may sound) then, adding your drums around it. After a bit of experimenting, you might find your workflow easier by starting with the drums, and that’s fine too!
From there, add as many accompanying sounds, instruments, and bass lines as you see fit. Once you’ve got a good loop foundation, it’s time to start arranging your sounds into a proper song structure.
Structure & Arrangement
You’ve got your main musical idea down pat, now it’s time to get your song finished. Fortunately, whether you’re producing Hip Hop beats or EDM, most music follows a predictable, and standard structure & arrangement. For instance, your typical hip hop beat generally consists of an intro, 16-bar verse, 8-bar hook/chorus, 16-bar verse, 8-bar hook/chorus, then an outro.
So an in-depth listen to a few of your favourite songs will allow you to easily pick up the basics of structure and arrangement. A good idea is to drag some songs you’re inspired by into your DAW and pull them apart.
Remember, your ears are the most important instrument when you’re producing. You don’t necessarily have to follow a particular song structure, if it sounds good, go with it!
Mixing
The final steps in getting your songs finished come down to mixing and mastering. You might have a well-composed melody in a well-structured arrangement, but if it sounds like a tin can, no one’s going to want to listen to it. So learning how to mix properly is one of the most important tools for making music.
But what is mixing? Mixing is when you take all of your recorded tracks and seamlessly blend them together to get the most out of them. Usually done by adjusting levels, panning and using various processors.
Once your levels and panning are on point, your mix can be broken down into three areas; EQ, Compression, and Reverb. If you focus on perfecting these three areas, the rest of your mix will fall into place. Again, Youtube is a great place to start when looking to learn the native processing tools for your DAW.
EQ
EQ’s or Equalizers are used to adjust the balance of the frequencies within your signal. Every sound signal is made of frequencies, and each frequency is measured with Hertz (Hz). Equalizing is the art of boosting, cutting and balancing all the frequencies in a mix to get the sound you want.
You’re probably familiar with the frequency spectrum being described as the highs, mids, and lows. Bass instruments and kick drums typically have a very low-heavy sound. So most of their output fits into the low-frequency spectrum. Whereas instruments such as snares and high-hats are often a lot more high pitched, so they typically are more prominent high frequencies. Keep in mind, even though these sounds fit into the high or low categories, they all have important information in both the highs and lows.
Compression
Compression is a dynamic processing tool used to keep an audio signal within a specific dynamic/volume range. Essentially, compressors are useful for making your loud sounds softer. So you can boost the overall level of a track while narrowing the dynamic range. Resulting in a much cleaner, and more enjoyable mix.
First, you’ll pick a volume level you always want your instrument to sound at (never louder, never softer). Then, you’ll set a compression level to determine how sensitive your effect will be. Resulting in every note played too quietly to be boosted into your volume range, and every note too loud to be softened to fit the range. So, your instrument will always be heard within the dynamic range you specified.
Reverb
To put it simply, Reverb is the reflection of sound. When you first record an audio track, it’s often left sounding dry and dull. Adding a slight touch of reverb is an effective way to give your instrument’s space. When you first open up your Reverb processor in your DAW, you’re probably going to be overwhelmed by the controls. So the best practice to get yourself familiar would be to experiment with the onboard presets, and tweak them to your leisure. You’ll quickly work out what settings are making your sound better or worse.
Mastering
The final stage of music production is Mastering. Mastering involves balancing all the elements of your mix and optimizing them for playback across all systems. Since Mastering is such a complex process in itself, we’re going to leave that out of this article. It’s something you don’t really need to worry about if you’re just getting started and worth saving for the later stages in your music career.
The Final Say
Follow the general steps in this article, and you’re sure to have a great foundation for making and producing some quality music. We urge you to experiment, play around, and most importantly, have fun doing so! Again, try not to fall into the masterpiece trap, thinking you have to create amazing songs every single time. Focus on finishing new tracks as often as you can, and you’ll watch your music-making skills skyrocket in no time!
READ MORE: How To Mashup Songs (Using Free or Paid DAW Software)