DJ controllers have become a transformational and irreplaceable tool in the arsenal of the modern day DJ. Specifically designed for elevating your performance during live gigs and sets, controllers allow DJs to mix tracks seamlessly.
These nifty devices allow you to improve the fluidity of your performance and music mixing by offering not just an intuitive interface but a customisable one. As one would expect, every artist’s preferences and work style will require a tailored set up of their respective DJ controllers. But how do you get started?
This guide aims to provide a comprehensive overview of DJ controllers, the importance of custom setups, and a step-by-step process for creating your own ideal configuration to help you take your performance to the next level.
Understanding the Role of DJ Controllers
Let’s start with the basics. What is a DJ controller and how can it help you?
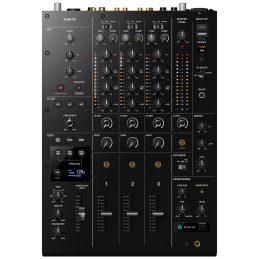
A DJ controller is a device that allows musicians to manipulate digital music files using software on a laptop or computer. Most commonly, these controllers combine two deck sections with a mixer. The essential controls are utilised through a variety of instruments such as jog wheels, faders, and performance pads.
DJ controllers have continuously been improved over the years. Modern day controllers offer both beginner and professional DJs greater control and enhanced capability over their music mixing. Portable, affordable and customisable, DJ controllers have revolutionised the traditional DJ world of turntables and old-style mixers.
Why Do You Need to Setup a DJ Controller?
When we talk about setting up your DJ controller, there are a number of steps to which we are referring.
One is obviously connecting it to your laptop and installing the necessary software. But more importantly, in many ways, is configuring the DJ controller to suit your personal preferences and performance style.
This can include customising the various controls, mapping the controller’s functions inside the software, and even integrating your other DJing equipment like microphones or effects units.
The better set-up your controller and the more complementary the set up is to your workflow, the more you will be empowered and enabled to perform fantastic live mixes and create unique musical experiences.
Why Custom Setups Are Necessary and Beneficial
Customising your DJ controller setup is crucial for several reasons:
1. Personalising standard settings
Every DJ has unique preferences regarding how they like to mix music. Every artist has their own style of working and their own intuitions.
Custom setups allow DJs to tailor their equipment to fit their style, rather than forcing you to adapt your style to suit the equipment.
2. Enhanced performance
The more your set-up feels comfortable and fits intuitively with your work pattern, the more significant the improvement to your performance quality. Custom mappings can help streamline transitions and effects and simply give you the confidence to realise your potential.
3. More adaptability
Different venues may require different setups. Different events may call for different performance styles. A customised controller can help you become agile and responsive to various environments, whether it’s a small club or a large festival stage.
4. Technical and creative improvement
A personalised setup encourages DJs to explore their creativity and develop their skills more effectively. The more in sync you become with your DJ controller the more you will be able to advance technically and creatively.
Step-by-Step Guide to Setting Up Your Custom DJ Controller
Step 1: Choose Your Equipment
Select a DJ controller that fits your needs. Factors you should consider budget, portability, and features. Popular options for beginners include the Numark DJ2G02. If you are ready for something more intermediate in design and complexity, try the Pioneer DDJ-FLX4 or the Native Instruments Traktor Kontrol S2 MK3. And for those more advanced among you, check out the Rane DJ ONE. Whichever you choose, make sure that it works for you!
Step 2: Install the Software
This step is straightforward and generic. You will need to download and install compatible DJ software like Serato, Rekordbox, or Traktor on your laptop or computer.
For optimal performance, make sure you have the latest version of the software.
Step 3: Connect Your Controller
Now it is time to start connecting your hardware and your software.
Use a USB cable to connect your DJ controller to your laptop. While most controllers will be automatically recognised by the software, if it does not work, you may need to go into your computer’s settings and connect it manually.
Step 4: Familiarise Yourself
Once you are set up, it is time to open the DJ software and navigate to the settings menu. It is worth taking the time, even though it might seem tedious, to really get to know the software. Explore the different settings and click around the interface. There are even YouTube video guides to help familiarise yourself with your chosen software and DJ controller.
Step 5: Configure Settings
When you feel more confident that you can navigate yourself around, it is time to start configuring the settings that work for you.
In most cases can customise both the audio settings and the MIDI map. The audio settings will determine the audio output for speakers or headphones, while the MIDI mapping allows you to tailor which buttons and controls on your controller enact specific functions. These might include hot cues, loops or other effects.
Step 6: Test your Setup by Playing
Before performing live, test your setup thoroughly. Play around with your new configuration to iron out the kinks and work out what best compliments your style and preferences.
We recommend testing all of the controls first to ensure that the responsiveness suits your needs. This includes the jog wheels, faders and pads.
Then check the audio output. It needs to be clear, without latency issues. Lastly, start playing with tracks from your library and see how easily your creativity is enhanced or obstructed.
Step 7: Practice Your Mixes
Spend time practicing with your custom setup. It is not enough to just assume that your initial customisation will suit your needs. You need to experiment with different effects and transitions to become comfortable with how your controller responds and develop a real intuition for how to best your DJ controller.
Step 8: Adjust as Necessary
There is no right answer when it comes to setting up and customising your DJ controller. Just because you initially customised your controller one way does not mean that you have to stick with it at all costs.
As you gain experience, continue to tweak your setup based on what works best for you. This could include changing MIDI mappings or adding new equipment like external effects processors or microphones.
Find the Perfect DJ Controller at DJ City
Creating a custom DJ controller setup is an essential step for any aspiring or professional DJ. By tailoring your equipment and optimising it for your style, you will enhance both your performance quality as well as your overall enjoyment of DJing.
Ready to find the perfect DJ controller? Head to our product page at DJ City, to find our wide range of controllers and other DJ equipment, suitable for artists at all stages, levels of experience and budget constraints.

