The Importance of Cleaning Your Microphone
Do you know how to clean a microphone?
It might not be something you enjoy thinking about or even something at the forefront of your mind, but keeping your microphone clean, hygienic and sanitised is a vital component of your equipment maintenance.
Even if you are cleaning your microphone, if you’re not doing it properly and carefully, you might actually be ruining the equipment at the same time.
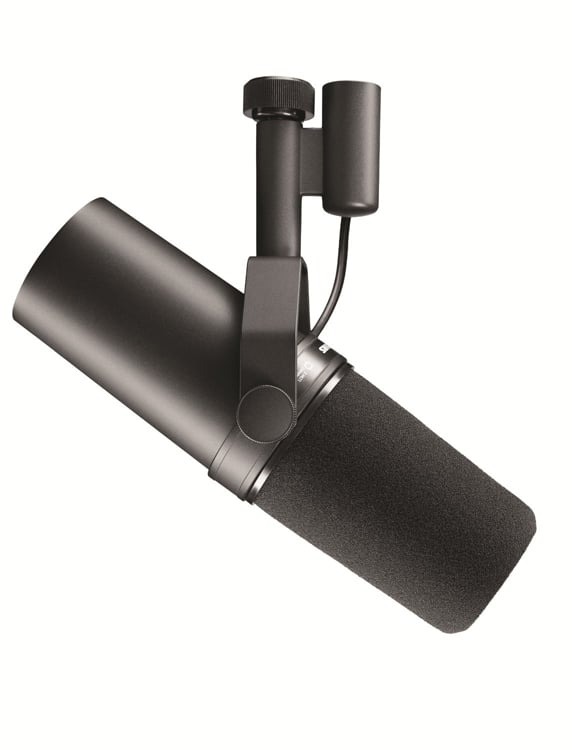
Microphones can get quite dirty. They’re often kept quite close to your face and are subject to a lot of material, dirt and saliva. If you haven’t cleaned your microphone recently, you might find what’s waiting for you underneath the grill and windscreen shocking. Getting into good hygiene habits is always important and your DJ microphone is no different.
The Difference Between Cleaning And Sanitising
We know what you’re thinking: Isn’t cleaning and sanitising the same thing? The short answer is no. The longer answer is below.
Cleaning
Microphone cleaning is usually a surface level type of clean. It involves mostly just wiping away debris, grime, dirt, and even sweat/saliva that has accumulated on your microphone. Cleaning is very important for both hygiene and aesthetic reasons.
Sanitising
Sanitising goes a little further. When you’re sanitising microphones and other DJ equipment you really need to get beneath the surface level. This requires removing the actual grille and windscreen and using a proper sanitising agent cleaner. (One that obviously won’t ruin your equipment at the same time.) Sanitising isn’t just about making your microphone look clean, it’s about getting in there and ensuring there are no germs or bacteria.
Sanitising, on the other hand, takes it one step further. This involves popping the body apart on handheld microphones, pulling off the microphone grill and windscreen, applying some kind of sanitizing agent (quite a bit stronger than just hard water and dishwashing liquid), and then giving your microphone plenty of time to dry.
While we’ll refer to just “cleaning” here, we’ll guide you through full top-to-bottom sanitisation as well.

What Types of Microphones Can Be Cleaned?
Both dynamic and condenser microphones are cleanable. Nonetheless, condensers, being more fragile, need to be treated with extra special care compared to the more hardy dynamic mics.
If you’re using a ribbon and valve microphone, we always recommend you get guidance directly from the manufacturer before attempting a clean to ensure you don’t damage any of the delicate components.
Whatever microphone you are using, they’re not designed or made to be submerged in water, so take care and follow the instructions. The last thing you want is a perfectly cleaned and sanitised piece of equipment that no longer works.
Cleaning Your Microphone
What NOT To Do
Before you get started, let’s set some ground rules.
- Don’t use any bleach or cleaning chemical that contains bleach.
- Do not use hydrogen peroxide or similar chemicals.
- Don’t use hand sanitiser.
- Do not use rough scrubbing equipment like scouring pads, steel wool or scrubbing brushes.
- Do not use hot water. Keep the water warm only.
- Do not re-assemble your microphone until it is completely dry.
Phew – that’s a lot of don’ts. Now, it’s time for the do’s.
Cleaning Tools and Products You need
Here’s a list of the different cleaning and sanitising equipment you’ll need to give your microphone a really robust clean.
Isopropyl alcohol
This popular cleaning agent offers a reliable and fully sanitised clean. Always dilute the alcohol with water so that it doesn’t evaporate too fast when you apply it.
Specialised cleaning agent
Alternatively, you can purchase a cleaner specifically made for cleaning microphones, such as the aptly named Microphone. Some people prefer peace of mind knowing they’re using a chemical that’s designed for use on sensitive, valuable DJ equipment.
Dishwashing liquid
Some DJs opt for the readily accessible dishwashing liquid they use to wash their household dishes. As long as there is no bleach or other harmful chemicals inside, it should be fine to use a soft, run-of-the-mill dishwashing cleaner.
Scrubbing equipment like a toothbrush
While you will need some scrubbing equipment to actually clean your microphone, make sure not to use hard or abrasive scrubbers. Many DJs opt to use a soft toothbrush for precisely that reason.
Disinfectant wipes
As part of your sanitisation step, you can use a cleaning surface sanitising wipe as long as they are not going to ruin the components and/or surface of the microphone.
Microfibre cloth
While we recommend the softness of a microfibre cloth, any soft cloth will do. Some people like to use paper towels (the soft kind!) but investing in a good quality microfibre cleaning cloth will never be a waste.
How To Clean Your Microphone
Step 1 – Unplug the cables
Obvious? Yes, we know. But it’s not a mistake you’ll want to accidentally make. Take a moment to unplug your mic from the power and unplug your headphones as well. The microphone needs to be completely disconnected before you start.
Step 2 – Surface clean
The first thing to do is to use a soft cloth (microfibre is ideal) and a bit of warm water to gently wipe down the surfaces of your microphone. This will remove the sweat, saliva, grime and dirt that’s caked itself to the top-level surface. Go slowly, even if it adds a few minutes to the job, and make sure you go everywhere.
Step 3 – Disassemble the microphone
Now it’s time to take off both the grill component and the windscreen. Remove any pop filters you normally use as well. This will give you much-needed access to the inner part of the microphone. Why is this important? Because all of the saliva and sweat accumulates and collects in this area. Use a gentle dishwashing-like cleaner to clean these parts first off. Make sure to remove any foam or soap with either a soft cloth or even compressed air.
Remember: Don’t soak anything!
Step 4 – Spray the components
Using the soft cleaning agent, lightly spray the rest of the microphone’s body and any other components. Once this is done, do not leave it to air dry. Wipe it off and dry it quickly with a microfibre or similar cloth as soon as possible.
Step 5 – Sanitise
Once cleaned, your microphone will be ready to be sanitised. Many DJs use isopropyl alcohol to give a deep, sanitised clean. If you are going to use isopropyl alcohol, we highly recommend diluting it by around 20%. Always flush out the sanitiser when you’re done with warm water and allow all of the components to air dry. Be patient and make sure it’s all completely dry before putting it back together. If you don’t, you’ll either run into problems when you plug it back into electricity or later on when your valuable equipment starts to rust.

Cleaning Grilles and Windscreens
Part of your microphone cleaning process will be the removal of the grille and windscreen. Both of these components should be easy to screw off and gently remove. If you’re too harsh when taking them off you could damage or break the microphone.
Use a soft toothbrush to apply warm water and washing liquid to your grille. Scrubbing gently will help remove the build-up of grime and saliva. Take care to get into all of the crevices, corners and edges when you do clean. Once done, make sure you use a soft cloth or paper towel to clean the grille completely. Not properly drying the grille could cause it to rust. If you’re going to let it air dry, make sure to leave it for long enough.
Warm water and washing liquid will also work for your windscreen. Once you’ve gently cleaned the windscreen, you should either use a blow dryer to clean it or let it air dry. We don’t recommend using a cloth for the foam windshield.
Dynamic vs Condenser Microphones
The process of cleaning dynamic microphones and condenser microphones is similar to the process outlined in the handy steps above.
Here is what to note, however, for each type of microphone.
Cleaning a dynamic microphone
One way to clean your dynamic microphone, being a little more robust than a condenser, quickly when being used by more than one person in quick succession is to use diluted mouthwash to scrub the grill. Always hold the microphone upside down so that the dirty particles are able to fall out. While not a super intense sanitising clean, it will offer a surface-level clean for the short term.
Cleaning a condenser microphone
Condenser microphones, as we pointed out, are certainly more fragile in terms of the inner components. Be mindful to always use super soft cleaning materials and scrub gently, especially because condenser microphones are either harder or impossible to remove the grille itself. Take care not to push the dirt and particles further into the inner parts of the microphone.
A Last Word on Microphone Cleaning
Now that you know how to clean your DJ microphone, it’s up to you to get into the habit of sanitising and cleaning your equipment regularly. More important than ever in today’s day and age, keeping your devices clean and hygienic might not be the most glorious part of professional DJing, but is certainly highly necessary.