How To Soundproof A Room Cheaply
Talk to any audio engineer, producer, or musician and they’ll tell you how they wish they would have acoustically treated and soundproofed their room or studio space earlier. Noise pollution can make recording audio significantly and unnecessarily more difficult.
But while there are some methods to soundproof a room that can quite quickly break the bank, it doesn’t have to be so expensive to effectively ensure noise reduction!
In this article, we will show you how to soundproof your room affordably and outline the different materials that absorb sound.
Soundproofing existing walls can be challenging, but we will address these obstacles and provide practical solutions to enhance sound insulation even in already constructed spaces.
This process does not have to be expensive, either, and that is why we have put together a cheap soundproofing solution for your studio – whether big or small. In fact, and more importantly, if you’re just getting your feet wet with acoustic treatment, you can get started for under $100!
- Why soundproof your room?
- What are the benefits of an acoustically treated space?
- Why is acoustic foam so expensive?
- What is the best material for sound absorption?
- What is acoustic foam made of?
- How can I soundproof a room cheaply?
- The Final Say
Understanding Soundproofing Basics
Soundproofing a room relies on your understanding of the basics of sound and how it travels.
Sound is essentially energy produced by vibrations, and it can move through air, water, and even solid objects. To effectively soundproof a home studio, you need to know how sound behaves and how it can be controlled.
There are two main types of sound to consider:
- Airborne sound; and
- Impact sound.
Airborne sound travels through the air, like voices or music, while impact sound is created by objects hitting each other, such as footsteps or furniture moving. Knowing the type of sound you want to control is crucial in selecting the right soundproofing method.
Armed with a strong understanding of these fundamentals and the distinction between sounds, you can make informed decisions to soundproof a room effectively.
Why Soundproof a Room?
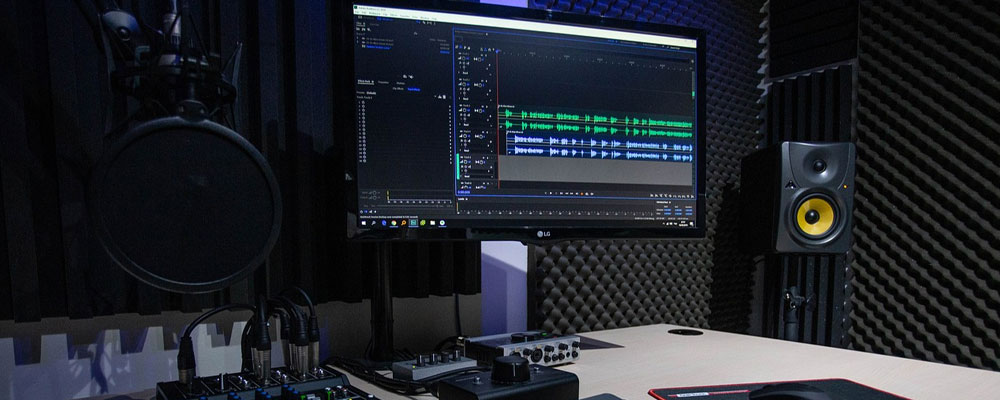
If you’re like us here at DJ City, you probably love your studio monitors. You may have saved up to buy high-quality monitors, and the minute you did, you felt like you levelled up in your music production journey. So why do so many of us invest in such important, quality equipment and end up putting them in untreated and uncustomised workspaces?
It might be because the mere thought of soundproofing and treating your room can be a daunting one. First, you’ve got the science to consider, then the supposed expense, and of course, the energy, effort and labour involved. You’d be forgiven for thinking this was a job that only experts could pull off, but it’s much easier than you think to soundproof your space.
Soundproofing an existing wall presents unique challenges, such as the need to add mass, resilience, and decoupling to improve sound isolation. Using a combination of methods and materials is crucial for effective results.
Above all, having an acoustically treated space is worth its weight in gold, and you’re guaranteed to progress your music creation much faster.

What Are the Benefits of Having a Treated Room?
Having a treated room offers numerous benefits that can enhance both your personal and professional life. As a DJ and musician, it is critical.
Here are the key advantages:
- Improved Sound Quality
A treated room helps reduce echo, reverberation, and sound reflections, resulting in a more accurate and clear sound. It is also important for reducing sound transfer and keeping out external sounds. This is particularly important for recording studios where sound quality is paramount. - Increased Productivity
A quiet and peaceful environment can significantly improve focus and concentration, leading to increased productivity. Whether you’re working from home or in an office, a treated room can make a big difference to your workflow and your ability to focus on the task at hand. - Better Sleep
Reducing sound pollution in your living space can lead to better sleep quality. A treated room can help block out disruptive sounds, allowing you to rest more comfortably. - Enhanced Comfort
A treated room provides a more comfortable and relaxing environment, reducing stress and anxiety. This can make your home or workspace a more enjoyable place to be.
Identifying the Source of Noise
Identifying the source of noise is crucial for effective soundproofing. Noise can come from various sources, and understanding where it’s coming from will help you choose the right materials and techniques to address it. External sounds, for example, may require different methods and soundproofing materials than internal sound loss.
External Noise Sources
External noise sources can be particularly challenging to manage, but identifying them is the first step towards effective soundproofing. Common external noise sources include:
- Traffic Noise
In urban areas, traffic noise is a prevalent issue and one that can be difficult to avoid. The constant hum of cars, buses, and motorcycles can be a significant source of disturbance even if you think you are normally quite used to it. - Neighbour Noise
Noise from neighbours, whether it’s loud music, conversations, or footsteps, can be particularly disruptive, especially in shared living spaces like apartments. - Environmental Noise
Natural sounds such as wind, rain, and wildlife can also contribute to the overall noise level. While these sounds are often less intrusive, they can still affect the tranquillity of your space. - Industrial Noise
Noise from factories, construction sites, and other industrial activities can be a significant source of disturbance, especially if you live or work near such areas.
By identifying these external noise sources, you can better plan your soundproofing strategy to effectively reduce sound transmission and create a quieter, more peaceful environment.
Benefits of Acoustic Room Treatment for DJs and Musicians
The main goal of an acoustic room treatment or the objective of trying to soundproof a room is to achieve a “neutral sound balance”. What does this mean? It is when frequencies are neither exaggerated nor in deficit, allowing your ears to perceive the source material as it was meant to be heard. You want to hear every sound as clear, raw and natural as possible.
With this, comes a whole host of advantages as a DJ and musician.
More than anything, having a treated room is going to give you the ability to produce a better-sounding mix, ensuring your songs sound great no matter which pair of speakers you’re playing on. You’ll be able to listen to every detail with clarity and make critical mixing decisions with ease. As a result, you’ll save so much time by not having to compensate for a poorly treated room.
Reducing noise pollution and background noise in your living space can lead to better sleep quality. Installing soundproof windows can help block out disruptive sounds, utilising principles such as decoupling and layered glass construction to minimise noise entering or leaving a room.
You’re offering a more professional service, which means you should also have the confidence to charge your clients more for any production services you offer.
Why Is Acoustic Foam Used to Soundproof a Room So Expensive?
Trying to soundproof a room can be an expensive exercise. A few reasons why something as seemingly simple as foam can be priced so highly. But the first reason that comes to mind is the fact it’s a small, specialised niche market with not enough competition to drive the prices down. When there is demand, it’s no surprise companies can get away with bumping the prices.
In saying that, another reason contributing to the high price of acoustic treatment is the cost of the machines involved in the process. Manufacturers need access to machinery that can effectively produce the material in the exact shaped mould. These machines can be extremely costly, so it’s no surprise the retail cost makes up for it.
But like everything, if you look in the right places you’re able to find soundproofing solutions that offer a much more affordable alternative to acoustic foam from Bunnings. Thankfully, DJ City stocks a wide range of soundproofing including the popular range of AVE Acoustic Foam.
What Is the Best Material for Soundproofing & Sound Absorption?
People looking to soundproof a room often confuse sound absorption with soundproofing, but they differ quite a bit. Sound absorption and soundproofing work like this: When sound encounters an object, they are either ‘soaked up’ (which is sound-absorbing) or reflected (which is soundproofing).
If you want to improve your studio’s acoustics, you need sound absorption. Essentially, this reduces the echo in the room due to the waves being absorbed and you’ll get an audible, clear sound within the room.
But unlike soundproofing walls, your music will still be audible in the next room, given the fact that sound-absorbing material merely reduces the echo of sound waves rather than blocking sound altogether. Soundproofing, on the other hand, will work to block sound from leaving your music studio space. Soundproofing materials can reduce sound vibrations that transmit through structures, improving sound isolation and overall acoustic performance.
One of the most commonly used materials for sound absorption is acoustic foam. It’s easy to install, affordable, and some of the most effective at absorbing sounds. Typically, acoustic foam consists of aesthetic fabric design with different patterns that all contribute to the visual look of your home.
So unless you’re in a massive space, acoustic foam is going to be your best bet for small and middle-sized rooms such as bedrooms, offices, and studios.
What Is Acoustic Foam for Soundproofing Walls Made Of?
Acoustic foam that offers strong sound insulation can be made from a variety of different materials, including:
- Convoluted Acoustic Foam – These foam panels feature an egg-crate design that’s specifically used in recording studios. Not only is it aesthetic but it’s also effective at reducing sound and correctly treating your studio space.
- Aluminum-facing Panel – Aluminum-facing foam tiles both absorb sound and are specially designed for high-heat spaces and environments, with the strong material providing extra protection from the heat.
- Fabric-Covered Foam – Fabric foam panels absorb sound and enable acoustical performance everywhere, including large rooms and theatres. Offering easy installation and maintainable fabric exterior.
How Can I Soundproof a Room Cheaply?
There’s no question that it isn’t always cheap to soundproof a room. But, where there’s a will there’s a way! This step-by-step guide is ideal for intermediate users who’re on a budget, but still happy to spend on the right products. Therefore, giving you longevity as well as quality in your recording studio!
Step 1. The Small Things
The first thing you want to do on your quest to soundproof a room cheaply and ensure an acoustically treated room is to fill all the gaps. If air can travel, so can sound. So it’s a good idea to rubber seal your windows and doors using weather strips you can pick up at Bunnings for less than $10.00.
Additionally, you’ll want to use your speaker placement skills to ensure your studio monitors are placed in the optimal spot. Because there’s no use spending up on acoustic foam if the simplest things haven’t been done right, to begin with!
Speaker Placement
It’s important to note that once you’ve chosen your new studio monitors, you can’t just put them anywhere your studio has room for them, power them on, and call it a day. Not if you want to effectively soundproof a room at least.
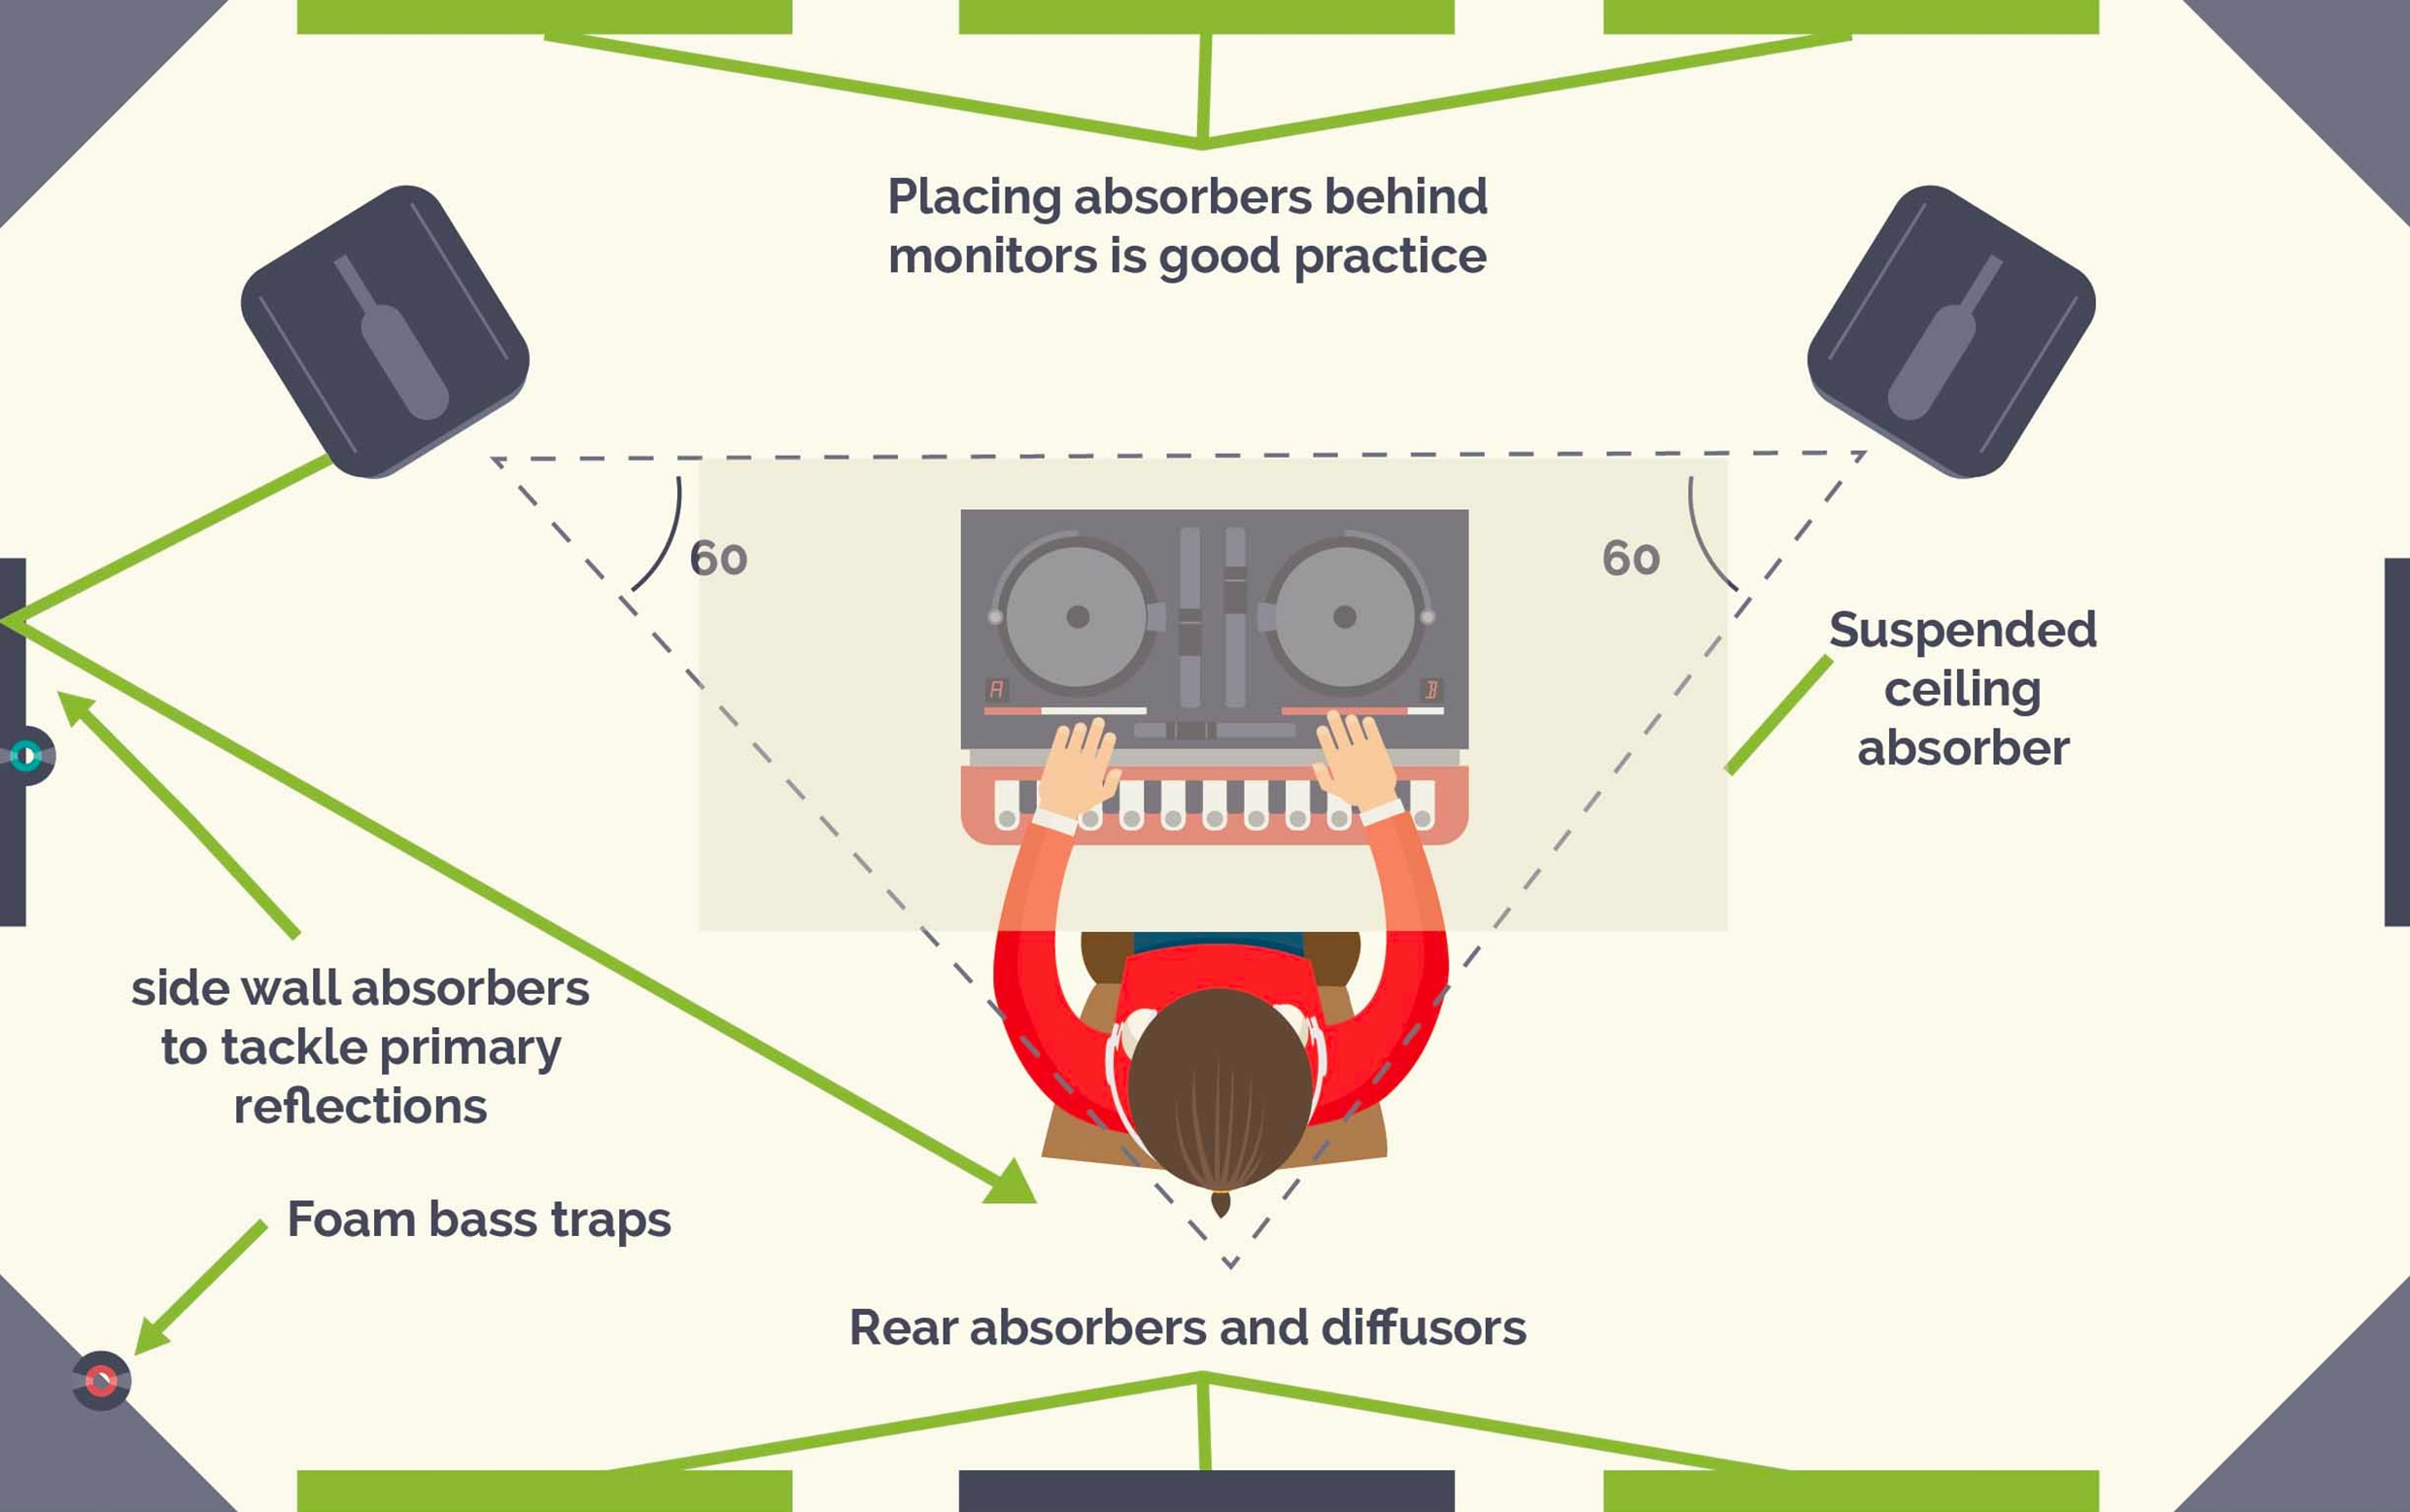
Assuming you’re operating in a typical small studio or bedroom, you’ll be looking at a pair of near-field monitors. Specifically designed to sit close to your ears, they’ll ideally be placed in an equilateral triangle between you and the monitors.
Always make sure that no obstacles are blocking the way between you and your monitors. If they are, they could impede the sounds coming from your drivers and ruin the integrity of your sound. Also take note of your surrounding walls, as sound waves will bounce off nearby walls and colour the audio signal that you’re hearing.
Another way to enhance your monitor’s accuracy is by placing them on a set of monitor pads, thereby isolating your speakers from whatever surface they’re sitting on. A set of studio monitor stands can help you place your speakers in an optimal location if you’re limited with studio space.
Alternatively, if you’re in a bigger room; midfield monitors are designed to be placed further away, at a further distance apart. Professional studios usually feature even bigger full-range mains speakers.
See the below infographic for a guide on good-practice studio monitor placement.
Step 2. Choose Your Acoustic Foam for Soundproofing Walls
When choosing your strategy for adding acoustic panels, you have two options. You can either buy some ready-made acoustic foam or build your own from soft materials that offer high levels of sound insulation. Both solutions can help to significantly dampen sound.
If this is your first studio and you don’t have much experience with acoustic treatment, we would recommend starting with at least one set of foam tiles or panels. It’s going to give you the best chance of gaining a proper understanding of how an acoustically treated room should sound.
Head to the soundproofing walls section on our website, and you’ll find several different options. When choosing acoustic foam, there are generally four main sound insulation features you want to compare.
1. Thickness
Typically you’ll find acoustic foam panels in thicknesses of either 5 cm or 10 cm. Although traditional wisdom states that thicker is better, in this case, 5 cm panels are considered the industry standard. They won’t absorb frequencies as low as 10 cm panels, but Bass Traps will take care of these.
2. Size & Number
Packs of foam panels range from 10 packs, 20 packs, 50 packs, all the way up to packs of 100. But you’ll also have to take into account the dimensions, as that is what is going to make up the total surface area and wall coverage. The more covered your soundproofing walls are, the greater you’ll be able to dampen noise and incoming sound absorb noise and prevent outgoing sound pollution.
Smaller panels are generally lighter and can be more easily mounted using non-permanent adhesives. So they’re a good choice for home studios where you’re not looking for a permanent installation.
3. NRC Rating
Another thing to consider with your acoustic panels when soundproofing is the Noise Reduction Coefficient rating (NRC).
An NRC of 0 indicates perfect reflection. While an NRC of 1 indicates perfect absorption. The better the NRC rating the greater the noise reduction.
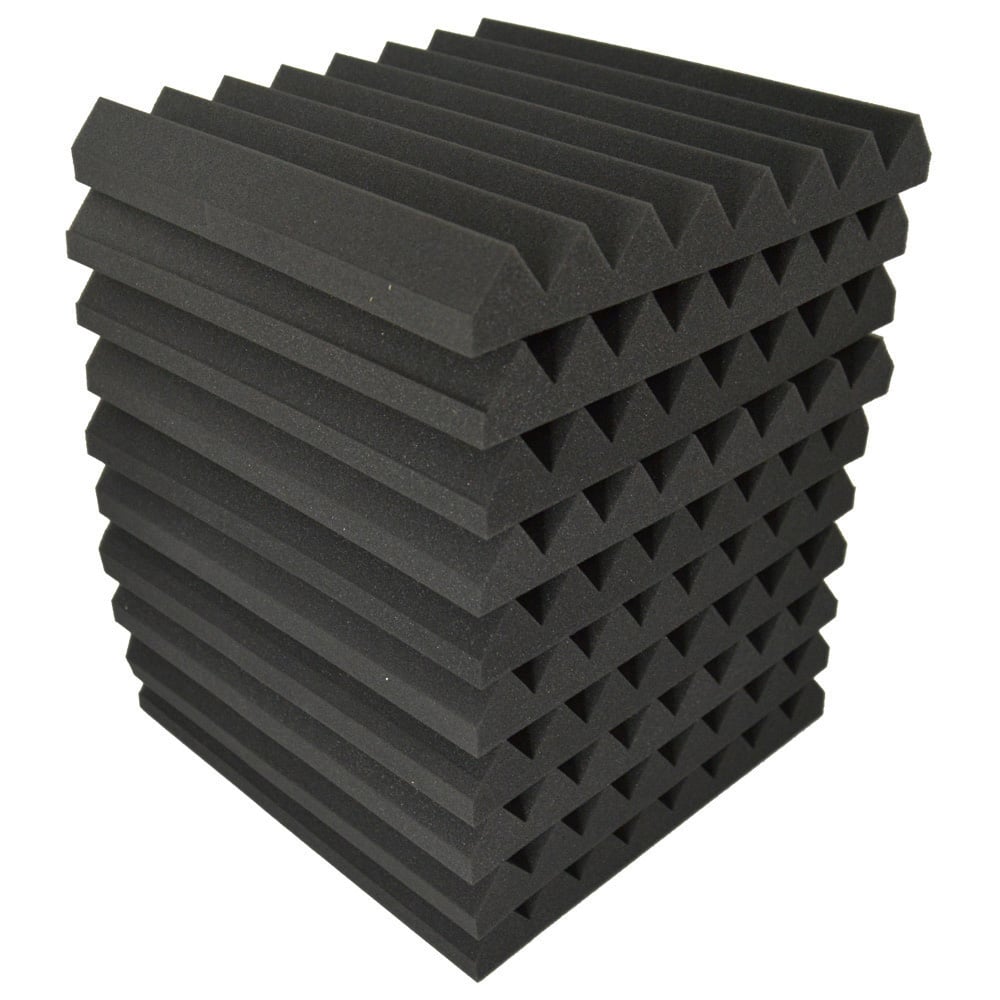
4. Surface Pattern
Finally, you’ll want to consider the type of 3D pattern found on the outer surface of your panels, whether it’s eggshell-shaped, pyramid, wedge, grid or something else. At the end of the day, the sonic differences between these patterns are minimal. So the best thing you can do is choose what pattern is going to make your room look the best!
So Which Acoustic Panels Are Best to Soundproof a Room Cheaply?
For its price AVE’s range of acoustic foam tiles offers some of the best specifications around, all at an affordable level. When compared to other cheap acoustic foam, a lot of their specs just don’t stack up. So going with the AVE range in stock at DJ City is the safest bet.
Assuming you’re looking for a 10-pack of panels to start working on in your home studio, you can’t go wrong with the following popular products.


These panels all have an NCR rating of .5, are fire-resistant, and have been rigorously tested. So you can be sure they’re going to do the job, all without breaking the bank. The only downside to the selection by AVE is that there’s currently no complete room package, such as you find from some other companies such as Auralex Acoustics. Although, on the other hand, you will pay a premium price if you decide to go that route so perhaps individual packs are better.
Step 3: Work Out Where to Stick Your Acoustic Foam
Assuming you’ve purchased some acoustic foam tiles, the next thing you want to do is cover your walls. Depending on the acoustic problems in your room, the ideal wall coverage could vary anywhere between 20-80%.
However, the only way to know how much coverage is necessary is to constantly re-test the acoustics after installing each panel using the clap test.
Generally speaking, many home studios have fewer than an ideal number of panels. Some even skip the maths and just place them in an aesthetically pleasing pattern. At the end of the day though, some are better than none!
The Clap Test
The clap test is a quick and cost-free way to get a good idea of what you’re dealing with in your listening room. This can be done by simply walking into the middle of your room and clapping your hands with a single sharp smack. But first, you’ll want to train your ears so you know what you’re looking for.
To begin, do the single clap outside where you’re a substantial distance away from walls that could reflect the sound. Notice you’ll hear the clap and nothing else: No echo or any sound of the clap occurring after the initial strike.
Then, go back inside and try the clap. You’ll probably be able to hear your initial clap as well as additional reverberation from reflecting off walls and other objects. If the sound has a lengthy duration, this likely represents some acoustical problems. If it dies out quickly, it probably points to better sound quality.
Practice the clapping test in different rooms to see if you can hear the difference!

Finding the Optimal Placement for Your Soundproofing Foam Tiles – Mirror Trick
The optimal placement of panels will maximise their effectiveness and help to soundproof a room cheaply by minimising the number of panels you need. The easiest and most effective method for finding the ideal positioning for your panels is by using the mirror trick. How do you do this, you ask? Well, it’s quite simple but you will need the help of a friend!
- Sit in your listening position.
- Have your helper move a mirror across the wall surface in between you and the speakers.
- Using a pencil, mark the beginning and endpoints where the speakers are visible in the mirror.
- You will want to view both the left and right speakers in your mirror. This is going to give you the area that’s going to be most ideally treated.
- Then, repeat on the opposite side.
- Get your acoustic foam up on the wall!
Step 4: Hang Your Acoustic Foam on Your Walls to Soundproof a Room
Assuming you have a small studio, you may be looking to make a start on improving your acoustics and soundproofing as cheaply as possible. Good news: You may be looking at a bare minimum cost of $95! Which isn’t that expensive, all things considered.
For example:
Acoustic Panels – From $45
Cardboard or Project Board to stick on to – $30 Total
Glue/Adhesive Spray – If your panels don’t already come with adhesive – $10
Removable Adhesive / Command Strips – $10
TOTAL COST: $95
How to Hang Them Without Damaging Your Walls
It’s quite easy to hang your acoustic foam to your walls without damaging them using this simple method. While also preserving your foam for when you happen to move studios.
- Step 1. Spray the backs of your panels with adhesive
- Step 2. Press the foam against your project board / cardboard
- Step 3. Let the glue dry
- Step 4. Cut off the excess board or cardboard around your foam
- Step 5. Use removable command strips to stick them to your wall
Soundproof a Room Cheaply – Bass Traps
Another thing you’ll want to look into if you’re serious about soundproofing your room is getting some bass traps! Acoustic foam panels are effective for mid to high frequencies, although they fall short when trying to absorb the more powerful low-end waves.
Low-end frequencies have very long wavelengths, meaning you’ll need more foam to absorb noise pollution at these frequencies. That’s why bass traps are important for any room that’s going to be used for recording, mixing, or mastering. These low-end frequencies tend to build up in the corners of a room, so it makes sense that you will most commonly see bass traps placed in the corners of a room.
Thicker foam equals more expensive price tags. Most homes and small studios don’t have space or funds to treat an entire wall with thick, bass-trapping foam, and you wouldn’t want to do that either.


Build Your Own Bass Traps
There’s no question that bass traps are the most expensive part of soundproofing your room cheaply. So you can either pick up a set of four to keep in the corners of your space. Alternatively, you can head to Bunnings and build your own at a fraction of the price.
You’ll need acoustic insulation, some timber, and light fabric to layer over the top. Again, head to your local hardware store and you’ll be able to pick up everything you need to build your own.
The Final Say on Soundproofing a Room Affordably
Soundproofing is that easy: Simply follow the steps in this article and you’ll be on your way to soundproofing a room cheaply. We’ve included some extra quick tips below to make sure you’ve covered everything, whether you want to reduce sound leakage or ensure your noisy neighbours are not disruptive.
- In a typical small room, you might place an absorber panel at each side of your listening position. Covering the mirror points we referenced above.
- Where possible, also put another panel on the ceiling above your head and cover the mirror points to reduce background sound pollution. You might also want to put panels on the walls behind your monitors.
- Place bass traps in whatever corners are accessible to absorb those heavy low-end frequencies.
If you need support with your soundproofing attempts and DIY solutions, reach out to the team here at DJ City. We don’t just stock a wide range of DJ equipment and gear, we also sell high-quality soundproofing materials as well. You can view our range of soundproofing products here.