How To Record A Podcast In Audacity: A Beginners Guide
So you’ve finally decided to start a podcast: You’ve got all the podcasting equipment you need, and now it’s finally time to actually hit record.
If you’re new to audio recording, this can be a daunting task to wrap your head around.
Thankfully, Audacity offers a free and open-source audio-editing software that makes recording a podcast a breeze. What’s more, we’ve put together this complete Audacity podcast tutorial so you can get started today!
Why Choose To Do Podcasting with Audacity
There’s literally endless audio software available, so why would you choose a free, open-source application for recording a professional podcast? Well, there are a number of reasons!
First and foremost, it’s free! If you’ve just made the decision to start a new podcast, chances are that you’ve dropped a generous amount of money on some new gear. So if you’re like most, you probably don’t want to then have to spend an extra few hundred dollars on software. It’s also incredibly powerful considering and offers a streamlined workflow for recording.
Although it often gets criticised for its outdated graphical user interface (GUI), Audacity is primarily focused on audio editing. So once you get past the looks and learn where things are, you’ll be recording professional podcasts in no time. Without the distractions of loads of other features that will only leave you feeling overwhelmed. When you’re recording a podcast, you really only need the ability to be able to record, cut, layer multiple tracks, move an audio clip or clips, and apply basic effects. Audacity does this all just fine, so it’s perfect for beginners.
It’s also cross-platform, so whether you’re using a Mac, Windows, or even Linux recording device,Audacity will work all the same. No matter what computer you have in front of you, you’ll know everything you need to in order to record great audio!

How To Record A Podcast
You might be overwhelmed at the thought of learning how to record your podcast for the first time, but you really don’t need to be. It’s a simple process that really only takes 3 steps! Once you’ve learned the basics, you’ll be on your way!
Download Audacity
The first thing you need to do is make sure you’ve got Audacity installed on your computer. If you don’t, simply jump on their website, download the appropriate file and follow the prompts.
Setup Your Microphone and Equipment
By now, you’ll have had your copy of Audacity installed on your computer. The next thing you need to do is connect your microphone to your computer, and make sure Audacity is primed for recording.
If you’re using an XLR Microphone, this means you’ll have to have it connected to your Audio Interface, then have your interface connected to your computer via USB. Alternatively, if you’re using a USB microphone, you can plug it directly into the USB port on your computer. Most of the time, your computer will automatically detect your new microphone or equipment and set it as the default. However, it’s important to double-check your computer has correctly recognised your microphone!
You can do this in a few easy steps, which we’ll outline below.
Mac OS X
Step 1
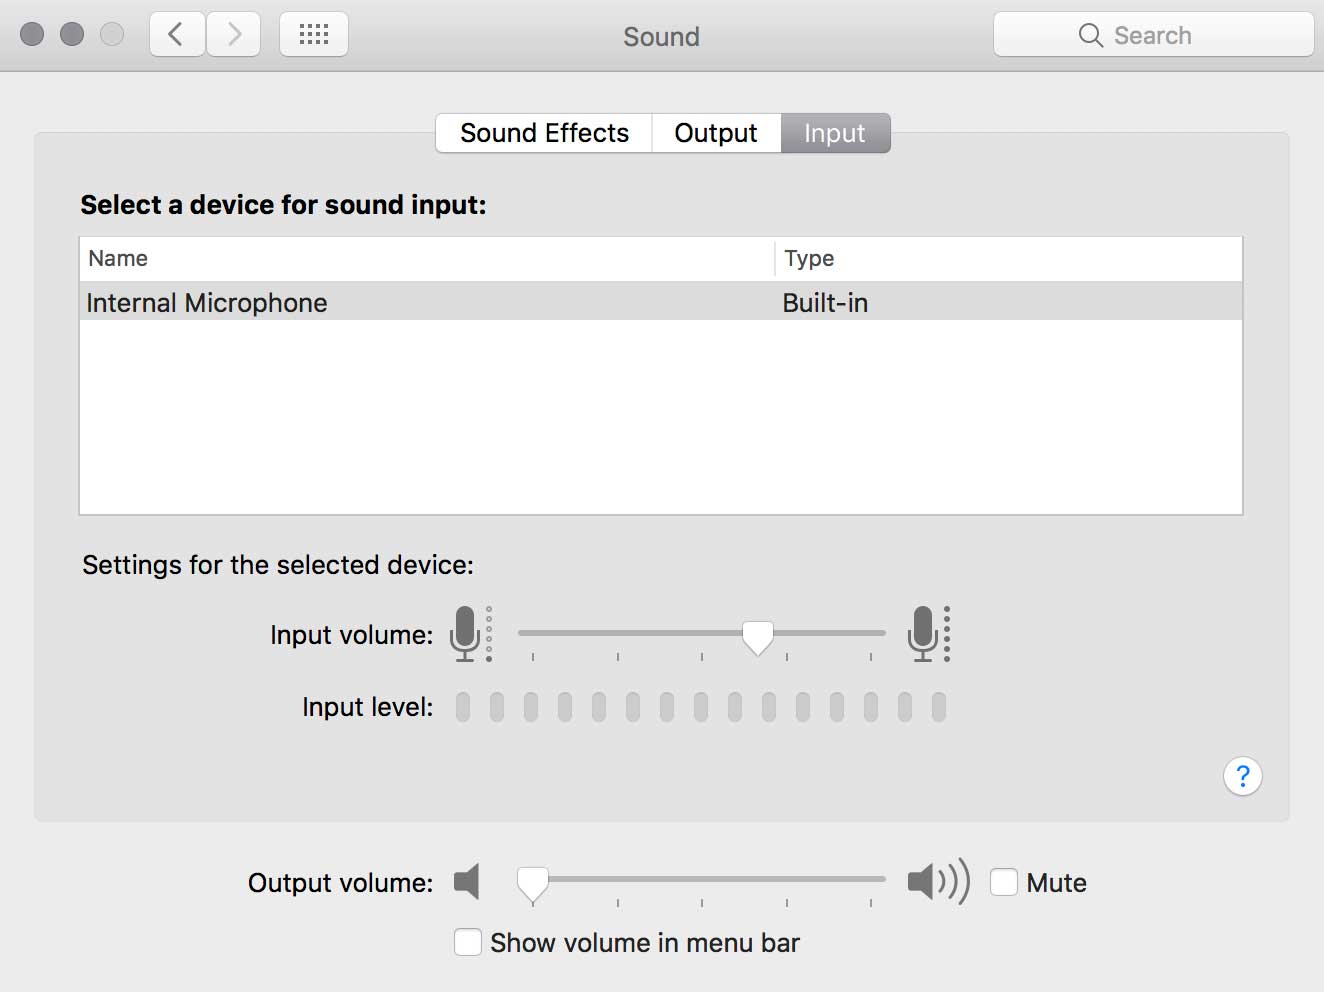
The first thing you’re going to need to do is to open up System Preferences, then click on Sound. You should then see a box that looks like this.
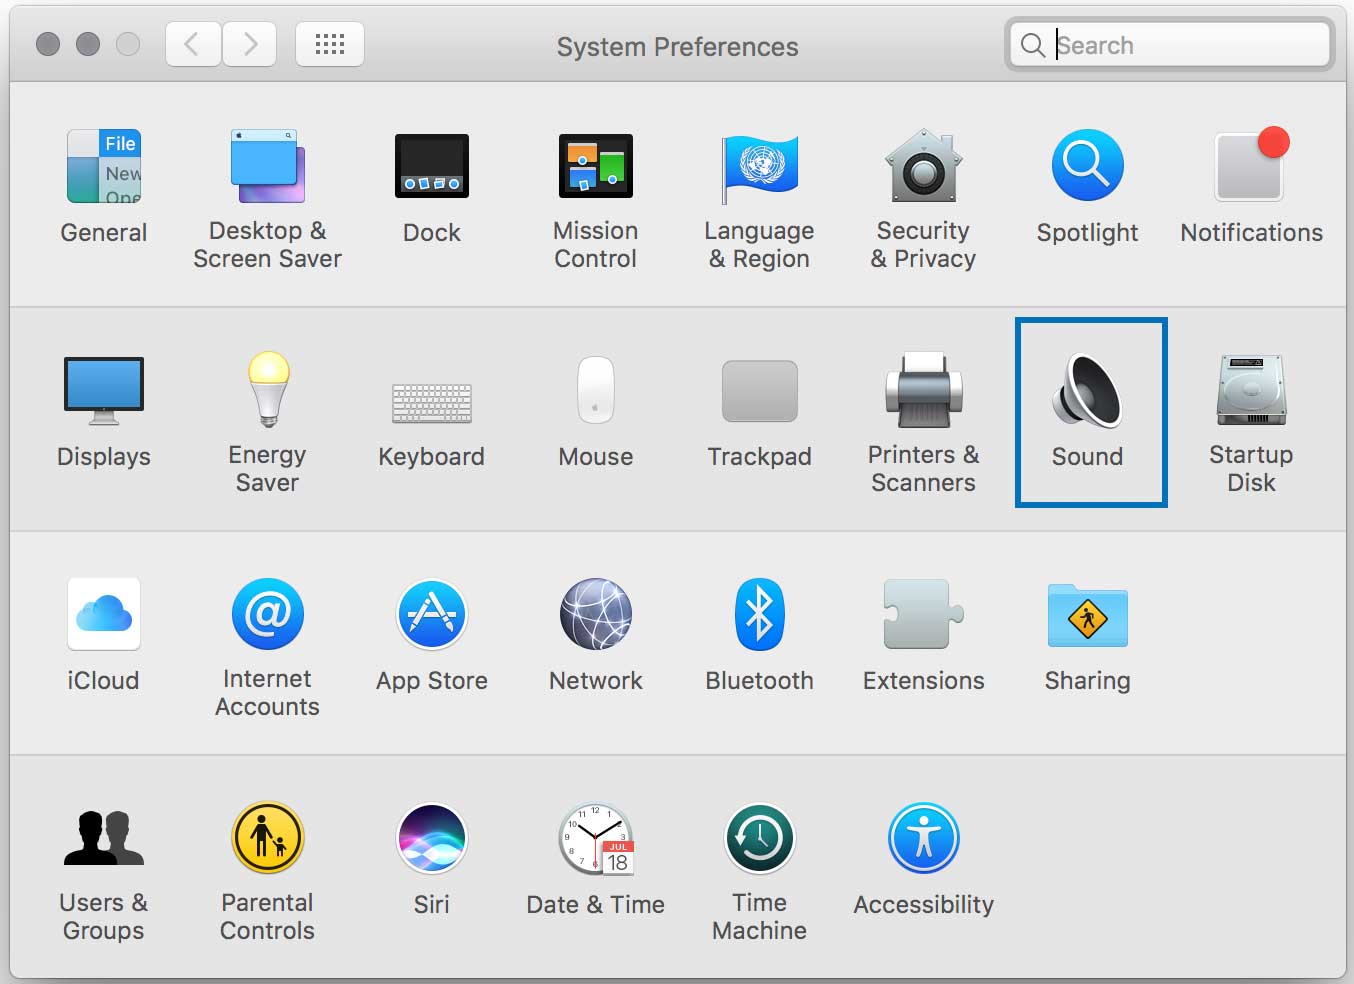
Step 2
From there you’ll want to make sure that under the “Output” tab, your desired headphones have been selected. Likewise, you’ll want to make sure your Microphone is selected under the “Input” tab. It’s important to note, that if you’re using an interface to connect your microphones, you’re going to see the name of your interface listed here (rather than the names of your microphones and headphones).

Windows
If you’re using Windows, the process is quite the same. Simply locate your audio settings and ensure your microphones and headphones or interface is recognised and selected.
If you can’t seem to find what you’re looking for, make sure you’ve downloaded and installed the correct drivers for your equipment. This is especially important if you’re using a new audio interface, as many are known to require driver installation before you can use them!

Recording

Step 1
The first thing you need to do in Audacity is head up to the top toolbar and make sure the correct microphone input and headphone input is selected.
Step 2
You’ll want to test your audio a couple of times to make sure everything’s good with your podcast sound and your signal isn’t clipping. If you’ve never heard the term, audio clipping is essentially when your audio begins to distort. The best way to monitor this is by checking the monitoring levels at the top of your audacity toolbar. You’ll want to make sure that your levels always remain in the green.

Levels
If you start seeing orange and red, chances are you need to turn down the recording volume of your microphone, and there are a few ways to do this:

- Adjusting the microphone recording volume from the Audacity toolbar.
- Turning down the gain level on your interface (If you’re using an XLR Microphone)
- Adjust the recording level on your microphone itself (If it has this capability which is mostly found on USB Microphones)
Step 3
Hit Record
Once you’re happy with your audio levels, it’s time to hit record on your podcast! If you’re not sure where that is, it’s the big red button up the top of your window. To be safe, it’s a good idea to do a quick test recording or two to ensure your audio is sounding great.
See below for a few extra tips that are sure to help you out during your recordings. Follow these and it should be enough to get your podcast recorded.
- Pressing either the Record button or the R key will commence recording.
- Pressing either the Pause button or the P key will pause the recording, but not stop it completely. So you won’t be able to edit any audio whilst paused.
- Finally, pressing either the Space bar or the Stop button will completely stop your recording. Allowing you to then apply further steps in the editing process to your audio.
- If you stop your recording, then you want to start again without creating an entirely new track; simply hold down shift while you press the record button, or hold Shift+R.

Editing
Once you’ve captured your audio, the next step is editing! This is the time to cut out any long or unnecessary pauses, mistakes, or anything you’d rather not include on the final audio.
What to edit?
Dead silence at the beginning and end
You’ve hit record but you haven’t actually started the podcast, or you’ve finished your podcast and haven’t stopped recording. It’s important to get rid of any of this “dead audio” that isn’t bringing any value to your podcast.
Ums and Ahhs
If there’s a section of the podcast where you completely lose track of what you’re saying and blurt out a number of umms and ahhs, it might be a good idea to remove them to keep your audio flowing. But it’s important to remember that too much perfectionism can kill your podcast all together! You have to keep it sounding natural.
Long Silences
Again, if there are periods of your podcast where there are unnecessarily long silences, you might want to shorten these. But you still will want to keep the podcast flowing naturally. If you want a quick way to achieve this, you can go to Effect > Truncate Silence to do this automatically.
Insert extra audio clips
Now’s the time to add in your intro/outro, sound effects, promos or commercials.
How to edit?
1. Make sure you’ve got the Selection tool activated (Located in the toolbar to the right of the record button).

2. Select an area you want to edit using any of the following techniques:
- Click and drag over an area
- Click at the start point of your edit and Shift + Click
- Move your cursor to the edge of the recording and drag left or right
3. Once you’ve selected the designated area, its time to make an edit. You can do this a number of ways depending on the edit you’re trying to make.
- To cut a section of audio and paste it somewhere else, you can use CMD/CTRL + X, and CMD/CTRL + V.
- To copy a section of audio and paste it somewhere else you can use CMD/CTRL + C, and CMD/CTRL + V.
- Delete and shift/condense the audio by using the delete key or CMD/CTRL + K.
- Delete audio without condensing your audio (Split delete) by using Cmd-Opt-K (OS X) or Ctrl-Alt-K (Windows). This is useful if you’re planning to add a commercial or something in between your audio.
- Silence a section of audio without moving anything by using CMD/CTRL + L.
- Remove all audio besides the section selected by using CMD/CTRL + T.
TIP: We said it before, but its important not to get too excessive with your edits. Above all, you want your podcast to remain natural sounding, and not obvious that you’ve made any edits at all.
4. Adding in your Intro/Outro, and additional sounds
You’ve made your cuts, deleted unnecessary audio, now it’s time to add in your intro and any commercials or sound FX you might also want to add. To do this, it requires nothing more than simply dragging and dropping your file into audacity, then selecting and moving your audio clip so it fits exactly where you want it.
Now you’ve got all the audio clips you need, it’s time to apply some final touches with effects to ensure your podcast is sounding crisp and clean!
Effects
Assuming you’re new to recording, we don’t want to overwhelm you with complex editing techniques, and the truth is, you shouldn’t really need them. While Audacity has the potential to do a lot more than many realize, there are only a few basic techniques that I recommend using when you first get started.
1. Fade In/Fade Out
Using a simple Fade In and Fade Out effect at the beginning and end of your podcast can add a professional polish to your finished product. It’s also extremely easy to implement by doing the following steps.
1. Highlighting the section at the beginning/end you want to fade.
2. Navigate to the Effect menu at the top of your window
3. Selecting either Fade In or Fade Out as desired.

TIP: It’s a good idea to make the fade-out last longer than the fade-in! You can also use the Crossfade tool if you want to fade between two separate tracks
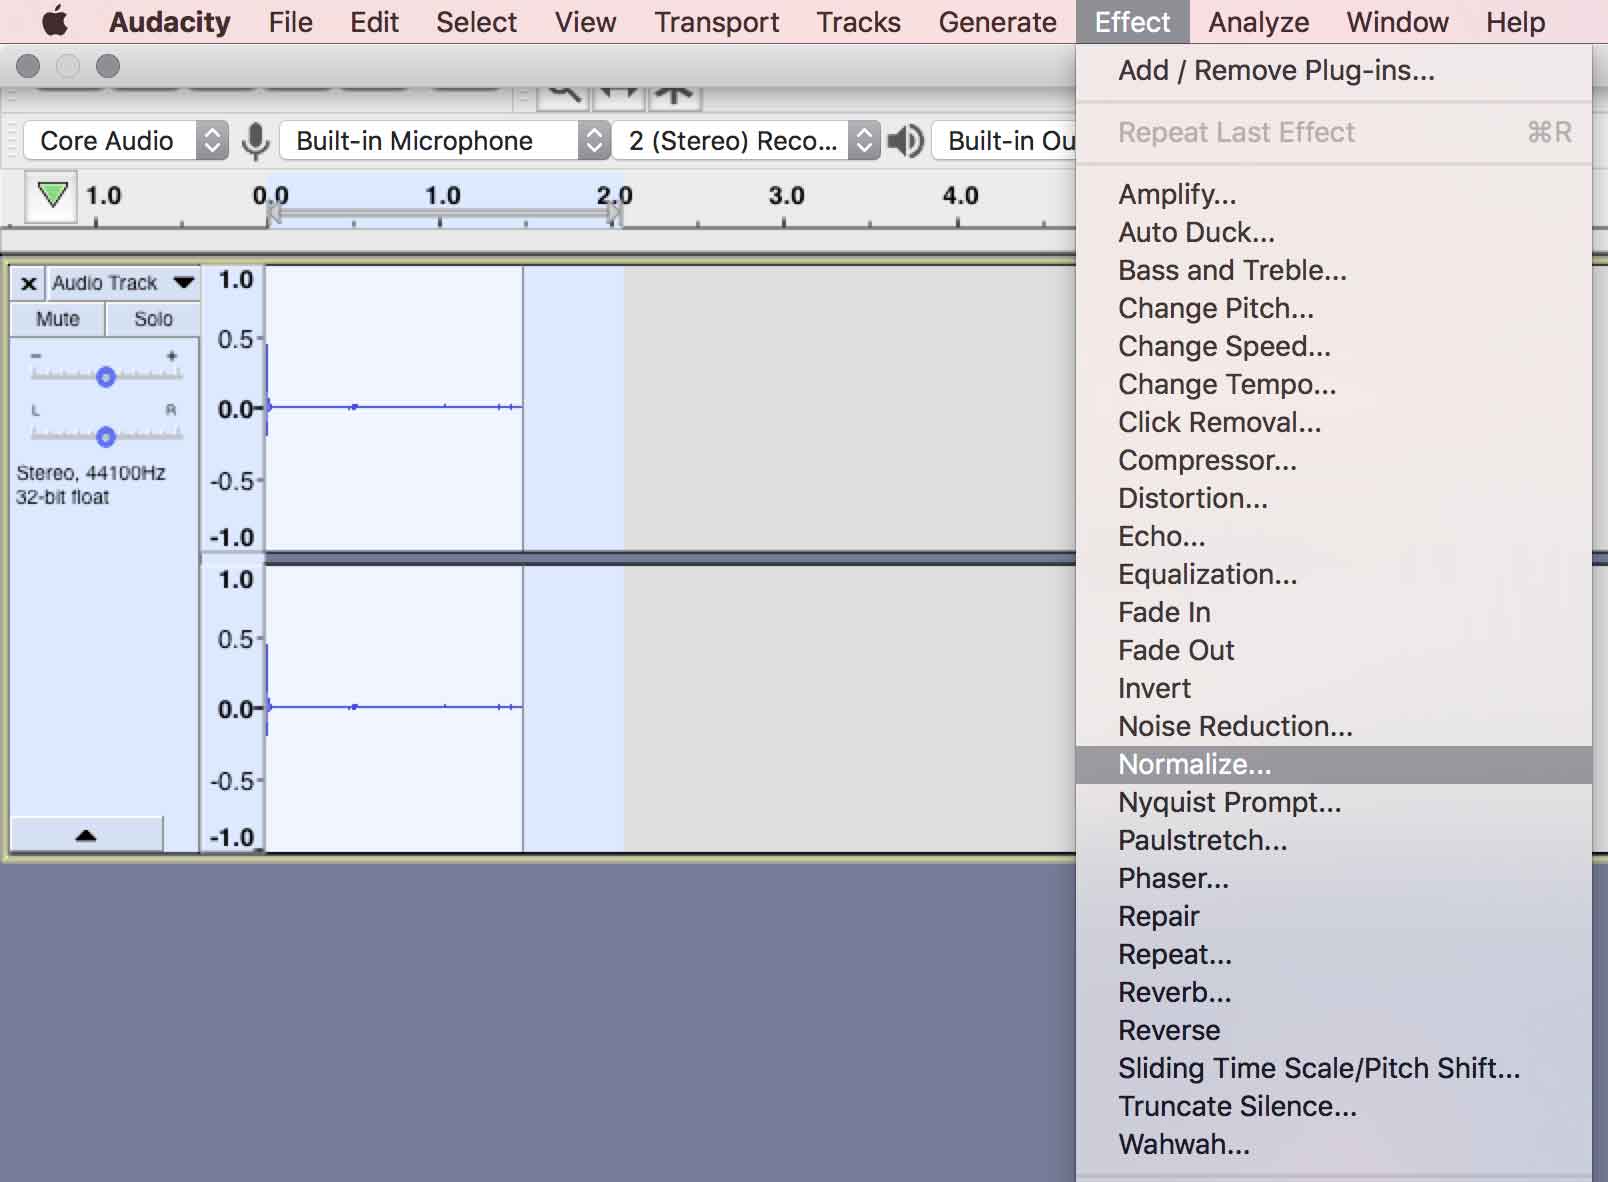
2. Normalize.
If you find that some sections of your podcast is quieter than others, a tool you might find handy is the Normalize feature. This technique works to bring the gain of your entire track to the max volume without clipping or distorting your audio. To apply normalizer, simply use the following steps.
1. Highlight the audio you want to normalize.
2. Navigate to the Effect menu at the top of your window.
3. Select the Normalize effect as seen below.
TIPS: It’s important not to normalize any areas where you have intentional variations in volume level.
3.Truncate Silence
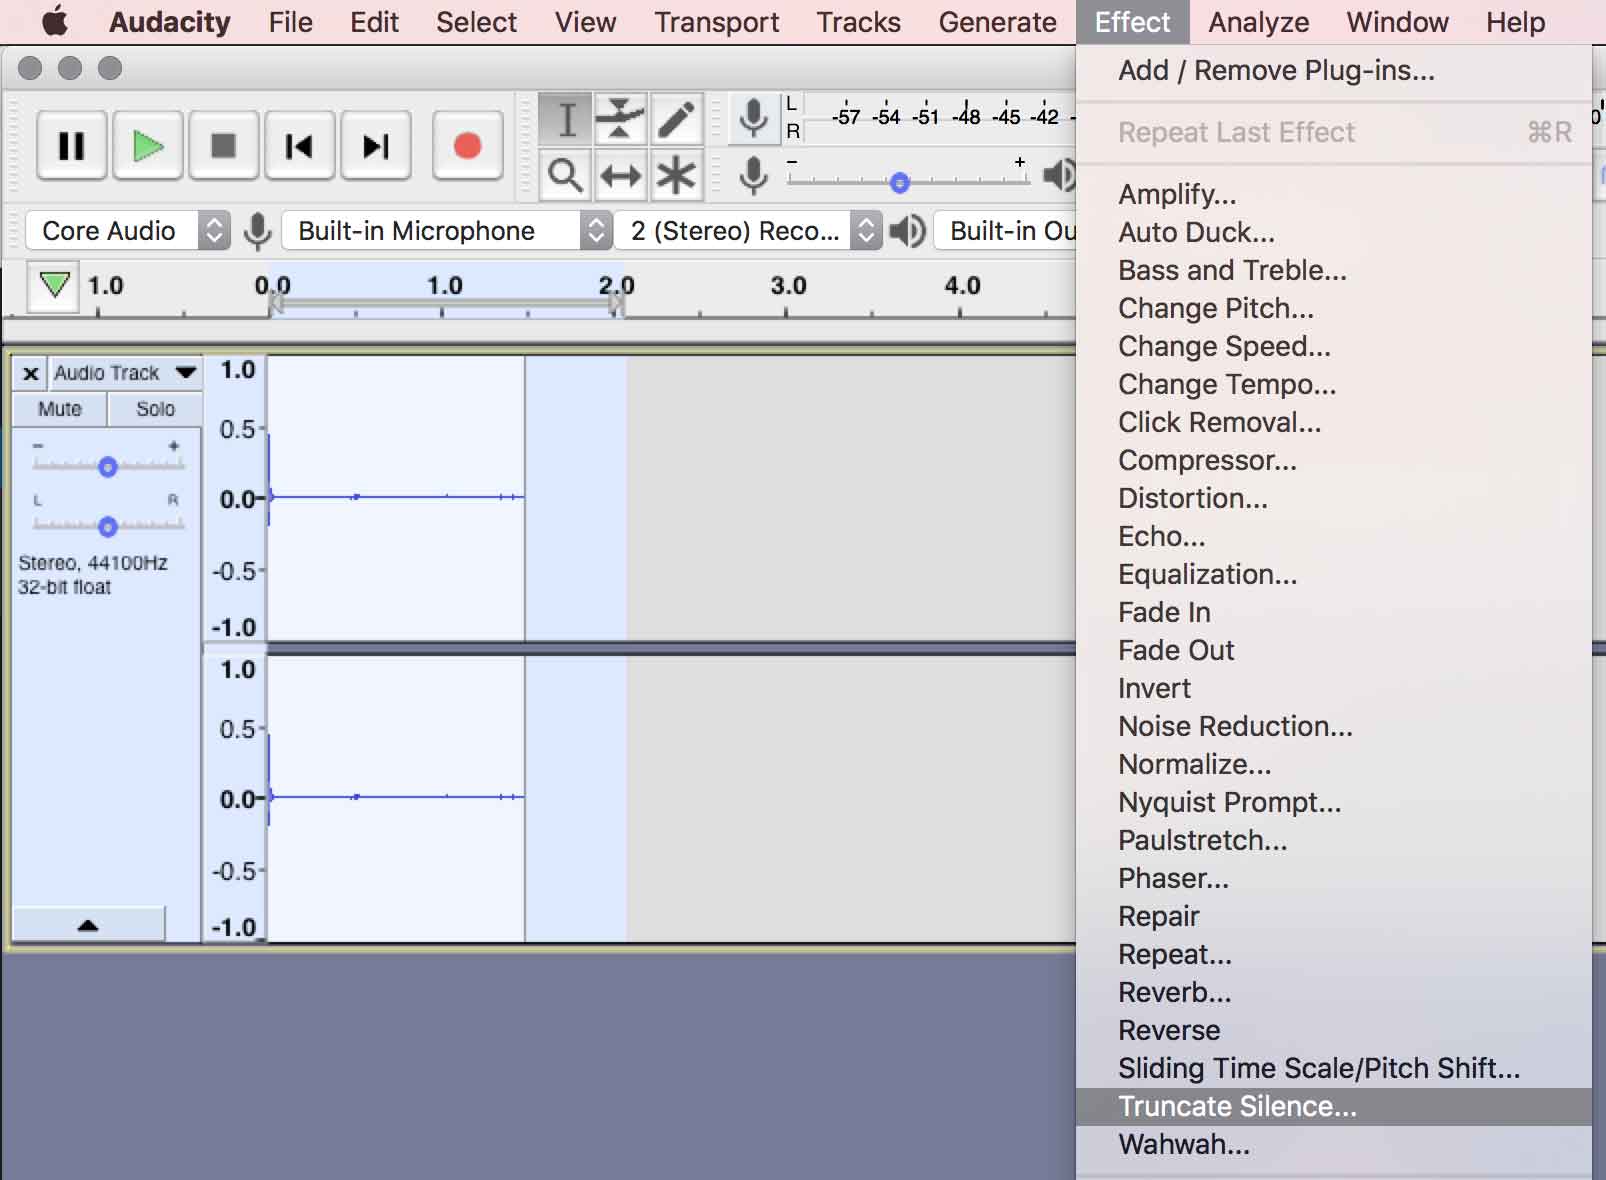
We mentioned it earlier, but using the Truncate Silence effect is a great way to remove any “dead air” during your recordings to keep things flowing! To do this, simply follow these few simple steps.
1. Highlight/Select your audio.
2. Navigate to Effects > Truncate Silence
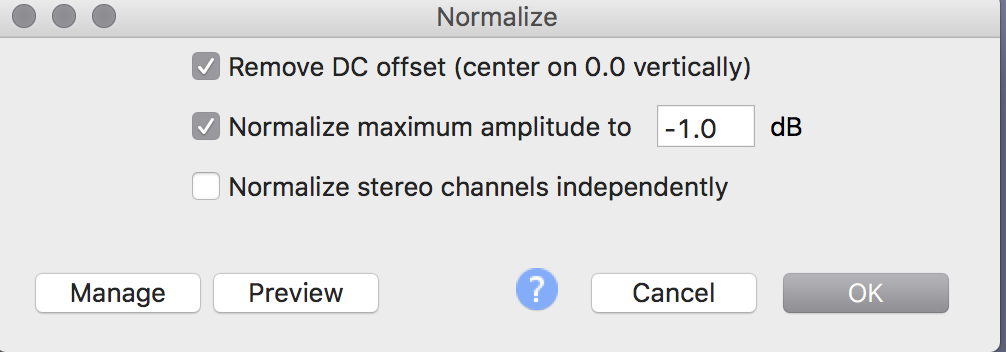
3. From there, you’ll find yourself with the following options window that looks something like this (See below)
4. Set your Operation mode to Truncate Detected Silence.
5. Set your Level to the appropriate level; so anything with a lower volume will be deleted. Experiment with this number but you might want to start with -30dB and work your way up/down if you need to.
6. Next, choose the Duration that a pause must last for to be considered silence. Therefore, any silence lasting longer than this amount of time will be ignored. It’s a good idea to start with something around 10 seconds (You don’t want to overdo it)
7. Set the Truncate to setting anywhere between 2-5 seconds.
8. Set Compress to 50 percent.

The list goes on
Audacity comes packed with a bunch of handy effects, and we could go into a lot more options that are at your fingertips. But we’d recommend starting off with the basics, especially if you’re a beginner.
If you are a bit more knowledgeable in audio editing, you might want to experiment with the Onboard Compressor and Equaliser, or even play around with stylistic effects such as Delay to add emphasis on certain parts of your recording.
Audacity gives you a lot of toys to play with but don’t think that you need to apply all of them, every single time. You have to find the balance between fine-tuning your podcast and overdoing it!
Exporting Audio Files
You’re happy with your podcast, and now it’s time to export your finished episode. But which audio format is best?
Generally, your typical podcast audio files are saved as MP3 files given it’s a universally used and compressed audio format that will work on nearly any recording device you throw it at.
Using an MP3 file with a mid-range bitrate is usually more than adequate for most spoken voice podcasts. Using 320kbps MP3s or even WAVE files that can easily exceed 100mb might increase your audio quality but they’ll also lead to higher bandwidth costs and longer download times. A spoken-word podcast will typically sound good at 64kbps, while a podcast that focuses on music might sound best near 128kbps.
This also depends on your intended method of hosting your podcast. If you’re utilising an external host such as PodBean or BuzzSprout, they might have their own requirements in terms of audio file types and audio quality. So be sure to check first.
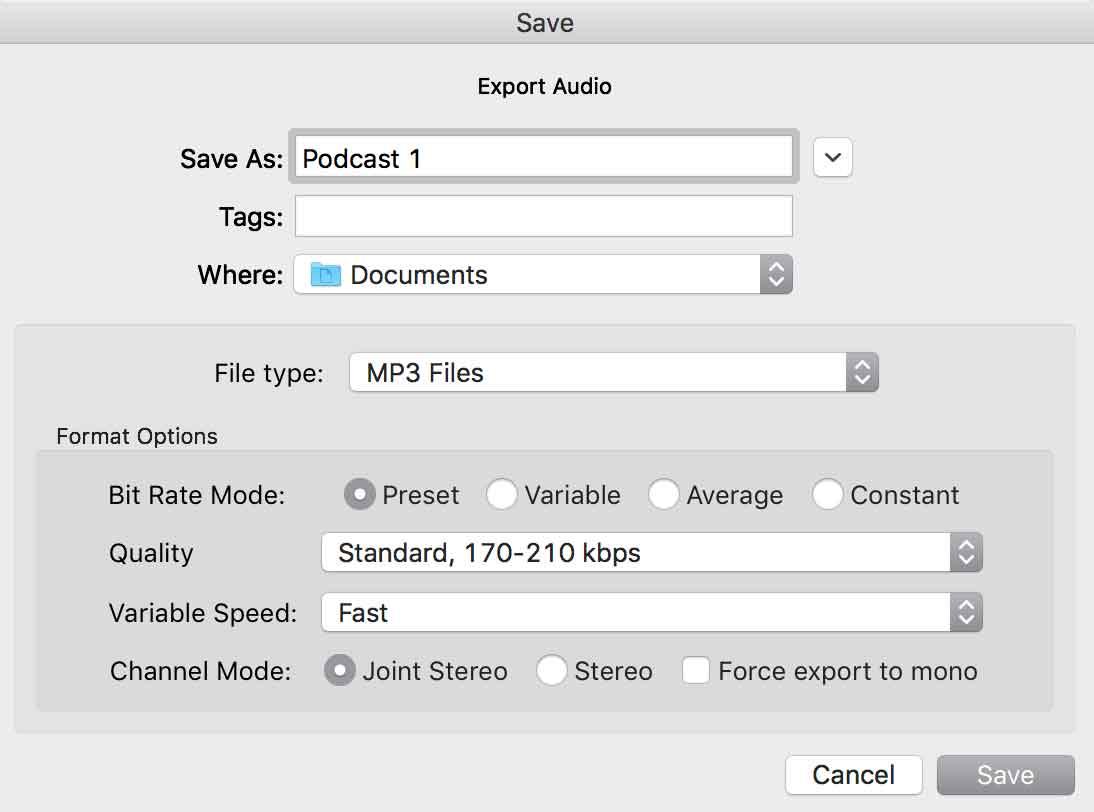
Below, we’ll run through how to export your audio to MP3, but the steps work exactly the same whether you’re looking to use .WAV or .OGG formats.
- Make sure you’re happy with your finished product.
- Navigate to File > Export > Export as MP3/WAV/OGG
3. From there, choose your desired settings and file name, then press export. When it comes to quality, and especially if you’re hosting on your own server, using the Standard setting will often be good enough quality, while keeping your file size low. However, if your podcast is music-heavy, you might want to move up to the Extreme or Insane settings, depending on your resources.
Hosting
By now, you will have hopefully got your podcasts first episode recorded and saved, where to next? How do you get your podcast on Spotify and Apple Podcasts?
It’s now time to consider podcast hosting! Essentially, in order to distribute your podcast on platforms such as Spotify, your MP3 file must be hosted somewhere on the internet.
You can do this yourself, however, it’s much easier to opt for a hosting company that’s going to do everything for you! Stay tuned for our follow up article where we discuss everything Podcast Hosting. For now, just focus on getting your episode recorded, edited, and ready to show to the word.
Keyboard Shortcuts
One way that’s sure to speed up your recording workflow is to make use of all the convenient keyboard shortcuts that Audacity has to offer. So, we’ve listed some of the most useful below for your convenience!
- Start Playback: Space Bar
- Stop Playback: Space Bar
- Listen to a selection: Space Bar
- Play audio up until selection: B
- Record: R
- Append Record (Add recording onto the end of current audio track) Shift+R
- Pause: P
- Move playback cursor in 1 second increments: Left and Right arrow keys
- Move playback cursor in 15-second increments: Shift + Left/Right arrow keys
- Loop Play: Shift + Space Preview a cut (Play 1 second before and after selection)
For more Audacity tips and assistance, give the DJ City team a call today.