Ableton MIDI Mapping Basics: Master Your Controller Setup
As with many different devices and interfaces used by DJs, there are a lot of handy tools and features available but finding your way around the basics can be overwhelming.
In this article, we’ll go through all the basics and clarify just about everything you need to know about what Ableton Midi Mapping is and how to use it.

Ableton – a brief introduction
Ableton Live is a DAW, or digital audio workstation, that was developed by the German company Ableton. This popular DAW was released around two decades ago and operates on both Microsoft Windows and macOS computers.
Useful for composing, arranging, mixing, recording and mastering music, it’s also widely used in live set performances and gigs as well. This makes Ableton a uniquely versatile and useful workstation for up and coming DJs to familiarise themselves with.
MIDI – what is it?
The term MIDI is short for Musical Instrument Digital Interface. It refers to a standardised ‘language’ or communications protocol through which a variety of musical instruments, computers, audio interfaces and other devices can ‘talk to each other’ and effectively transmit data and audio.
One important technical thing to note is that the term MIDI doesn’t actually refer to the sending of the audio but rather the ability of the device or software on either end to send or receive the data/audio. MIDI keyboard controllers, for this reason, don’t actually output any sound but can interact with other devices through sending MIDI communications.
Ableton Live, as a software, will receive (or transmit) and interpret the data, audio and sounds.


Understanding MIDI Mapping
With the basics of Ableton and MIDI out of the way, we can turn our attention to MIDI mapping.
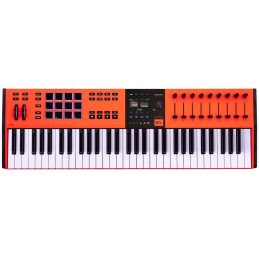
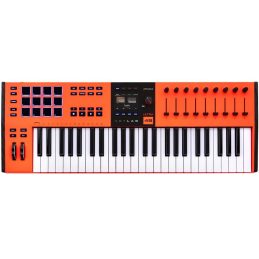
Creating a MIDI map is one of the best and most helpful features offered by the Ableton Live software. While you can create music and sounds directly through your computer using the good old mouse and keyboard, the MIDI mapping feature allows you to connect a digitally enabled instrument, such as a piano keyboard or even a MIDI controller, and input your music that way.
There are numerous benefits to MIDI mapping:
- More intuitive way for musicians to create music.
- Allows more of natural musical performance.
- Relieves you of working over a computer.
- Can be more enjoyable.
- Can increase productivity.
Controlling the MIDI Mapping
Ableton Live allows users to control the various buttons and knobs on your MIDI controller or instrument and determine how it affects the MIDI data. In other words, you can customise your controls to suit the way you work and function in a way that’s as seamless and intuitive as possible. Whether it’s controlling the volume, panning or muting of different audio, you can change the way your various controls function and what the effects are.

Getting Started
Setting up your MIDI controller or keyboard properly is important for ensuring that everything works properly. Take the time to go through these steps to ensure that your MIDI mapping is working as properly as it should be.
1. Connecting Everything Up
Your DJ equipment should be connectable to your computer through a cable such as a USB. This allows you to easily plug one device into the other. If you’re having problems with latency, you might want to consider using an audio interface.
2. Open Up Ableton
Now you’re ready to open up Ableton and start setting your preferences. You can do this through the main menu. Click on the option of “Link MIDI” and go to the MIDI Ports part. The name of your controller or keyboard should be displayed twice in both the input and the output options.
3. Enable Track and Remote
Make sure to turn on the Tracking and Remote options. Then you can close the menu and you’re all done.
Setting MIDI Mapping Controls
To turn on the MIDI mapping mode you will need to find the button in the top menu on your screen. It’s likely to be on the right-hand side and labelled MIDI. Click this and if everything has turned blue that means you’re now in the mapping feature.
Start choosing the different controls and parameters that you want. When you select any given control, it will become highlighted. That’s your cue for then putting in the physical input (button pressing, knob turning or switch flicking) on your device.
The control will then change to display the value chosen. This means that the MIDI mapping was successful for that particular action. Keep doing this until you have set all of your controls the way that suits you.
When you’re finished and ready to start testing your newly set MIDI mapping, click on the MIDI button in the top right again. You can then start using your external device to change and move the audio inside the Ableton Live software.
Of course, you can go back and re-enter the MIDI mapping mode to change anything you want.
MIDI Mapping Options

There are many different options for MIDI mapping in Ableton Live, including:
- Activator or Mute
- Arm Session
- Arrangement Record
- Automation Arm
- Back to Arrangement
- Backward Nudge and Forward Nudge
- Clip Gain
- Clip Quantization
- Clip Scrub
- Clip Transpose
- Clip View
- Clop Stop
- Crossfade Assign
- Crossfader
- Device Activator
- Draw Mode Switch
- Follow
- Loop Switch
- Loop Switch, Length and Position
- Metronome
- MIDI Arrangement Overdub
- MIDI Step Input (Left and Right)
- Monitoring
- Move Up or Down Scene
- Parameter Controls
- Play
- Position of Set Loop
- Prepare Scene
- Preview
- Preview (Editor)
- Previous or Next Locator
- Punch In Switch
- Punch-Out Switch
- Quantization
- Re-enable Automation
- Record
- Scene Launch
- Select a Device
- Select Clip Slot
- Select Track
- Send
- Set Locator
- Set Start and End
- Solo or Cue
- Stop
- Stop All
- Tap Tempo
- Tempo
- Tempo Nudge Down
- Track Launch
- Track Pan
- Volume
Viewing Your Controls

If you want to see all of the MIDI mappings that are currently in place, you can always turn on the mapping feature again and click on the ‘left hand’ side browser window. This will allow you to view the note/control, path, name and other details such as minimum and maximum values if applicable.
You can get rid of a particular parameter directly through this browser or by deleting it with your keyboard.
Saving Your MIDI Mapping
When you save your audio project in Ableton, the MIDI mapping will be saved along with it. While this is useful for that project, it does mean that when you open up a new one it won’t have all the MIDI mapping you already set. One way to solve this problem is by creating a control MIDI remote script. There are free script building apps available to help you do this in Ableton.
Alternatively, you can save your MIDI mapping to a blank template and use that template every time you’re starting a new project. Just make sure that you save your new project separately from the blank template. You can automate this by setting your blank mapped template as the default. Go to the Preferences setting menu and click on File/Folder to select the “Save Current Set As Default” option.
Deleting the MIDI Mappings
To delete your MIDI mapping, make sure you are in ‘the mapping’ mode. While any particular control/parameter can be right-clicked on and deleted, this can also be down through the left-hand side browser.
DJ City – for all your DJ needs

The best way to get the hang of your Ableton Live MIDI mapping is to get started and play around. You’ll learn what works for you and what sort of controls optimise your music creation, mixing and playing.
If you would like to find out more about all things DJ hardware or software, make sure to reach out to our team right here at DJ City today.